


Simple bare metal restore of your load balancer with a USB stick
Does it seem like some appliance vendors go out of their way to make hardware recovery and licencing as difficult as possible?


Last update: Aug 2024
Does it seem like some appliance vendors go out of their way to make hardware recovery and licencing as difficult as possible? Many engineers including myself have plenty of horror stories such as waiting hours for licence keys to be activated while your site is down... or having to install multiple updates, or it just not working at all!
One of the nice things about the Loadbalancer.org appliance is the ability to do a bare metal restore from USB stick, we've supported this right from the very earliest versions of the product. Which we've always thought is pretty useful — But now its even better, beacause you simply restore your latest backup (which includes your licence keys!).
How simple is that?
Lets get started...
Actually, before you do that — Please contact support before you start blowing away your hardware configuration! We're always here to help :-).
Things you will need to get this done..
- Any supported Loadbalancer.org Enterprise hardware appliance.
- A USB stick 4GB or larger.
- A copy of our latest software image (Please ask support@loadbalancer.org)
- A copy of the free Rufus software for writting the image to the USB stick.
- Your backup file — and the password!
Windows users can create the USB stick using Rufus:
- Download the latest Loadbalancer.org ISO file to your windows machine.
- Insert the USB stick (D: drive on my test box)
- We have been using rufus. Use the Windows x86 version to copy the ISO image to the USB stick but if you have a preferred method feel free to use that.
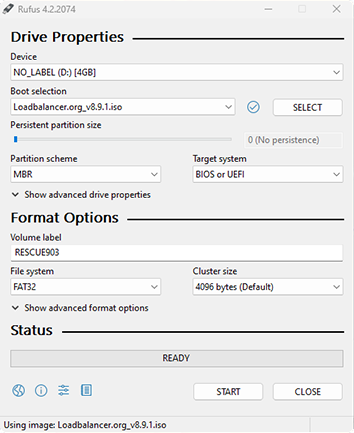
- Make sure you have the correct image and device settings.
- Hit the START button
- Select the default ISO option and confirm yes to the warning.
Installing the image to your Loadbalancer
NOTE: Please Remember to back up your existing configuration before starting the upgrade.
- Connect the Keyboard and monitor to the Loadbalancer.
- Check that your boot mode is set to "UEFI" in the BIOS.
- Power down Loadbalancer.org appliance.
- Insert the USB stick in an available USB port.
- Power on the loadbalancer
- Select the USB stick as the first UEFI boot device from the BIOS (with some Supermicro and Dell appliances you can just push F11 to select the boot device).
- Boot from the USB Stick.
- Wait for the question - "Do you wish to continue? please enter yes or no"
- Careful! Typing yes will completely wipe your existing system and install new version from the USB stick. Typing no will shutdown the loadbalancer so you can remove the stick and no changes will be made to your system.
- After the installation is complete you will be prompted to press enter to shutdown the loadbalancer.
- After shutdown remove the USB stick.
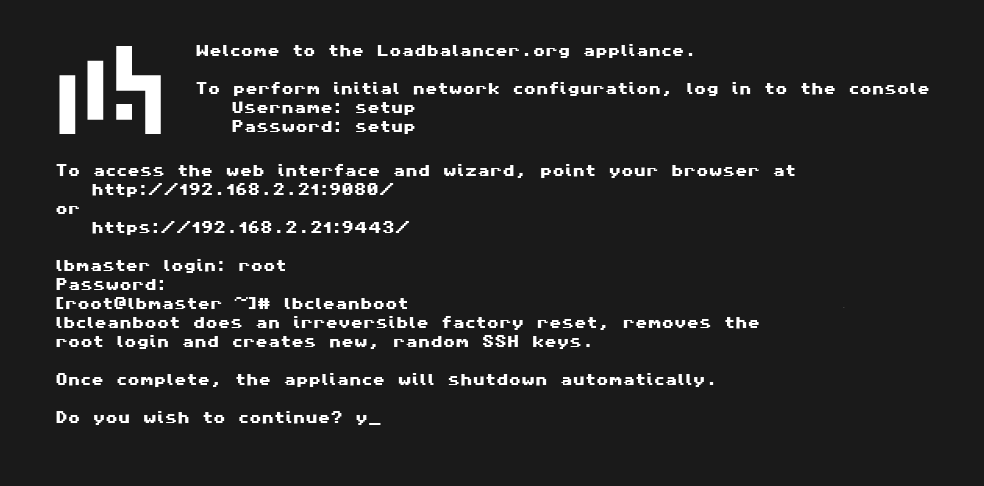
- Power on the loadbalancer and if the installation has gone successfully you should be presented with login prompt.
- Login to the loadbalancer username: root password: loadbalancer
- Run the command lbcleanboot , This will secure the box by removing the root login etc. and then shutdown.
- Power up the load balancer again and you will be prompted to login as setup/setup (See the quick start guide)
- Configure your basic IP settings and DNS etc.
- You should now be able to connect to the load balancer's IP address in your web browser and continue the configuration:
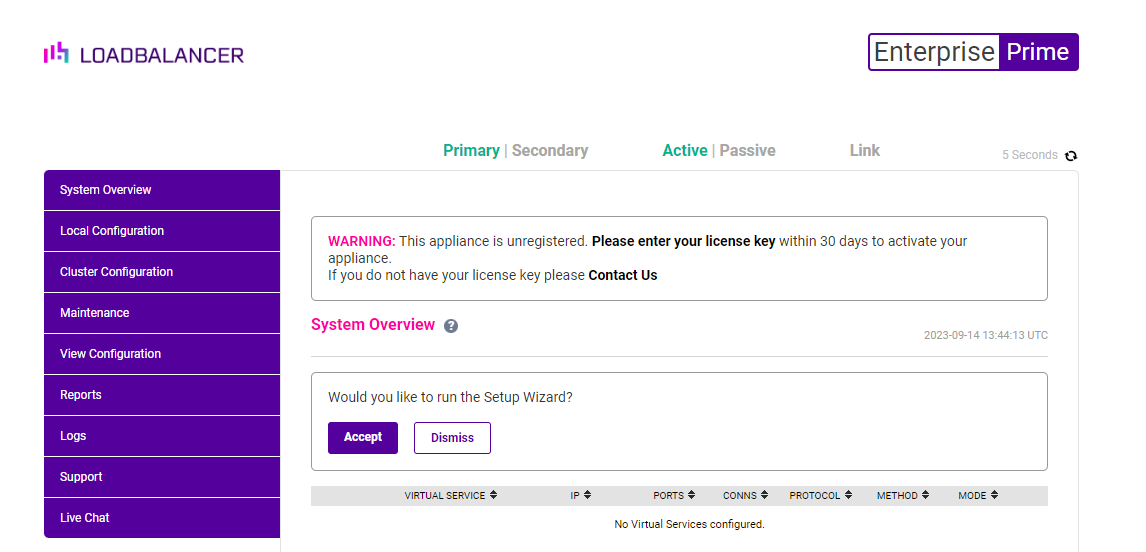
Note that the default licence is for our base hardware model the Enterprise Prime...
And now for the magic one step restore...
- Navigate to Maintenance > Backup & Restore
- Choose your selected backup file (which MUST have been encrypted with a password to ensure it can safely store all certificates and licence information).
- Make sure you enter the password correctly — and then hit Upload & Restore.

When the restore is complete you will need to restart the services:

And a few seconds later... We're up and running again.

And notice that the hardware licence has been upgraded to Enterprise Flex.
How cool is that?
But hey, we're not saying its perfect...
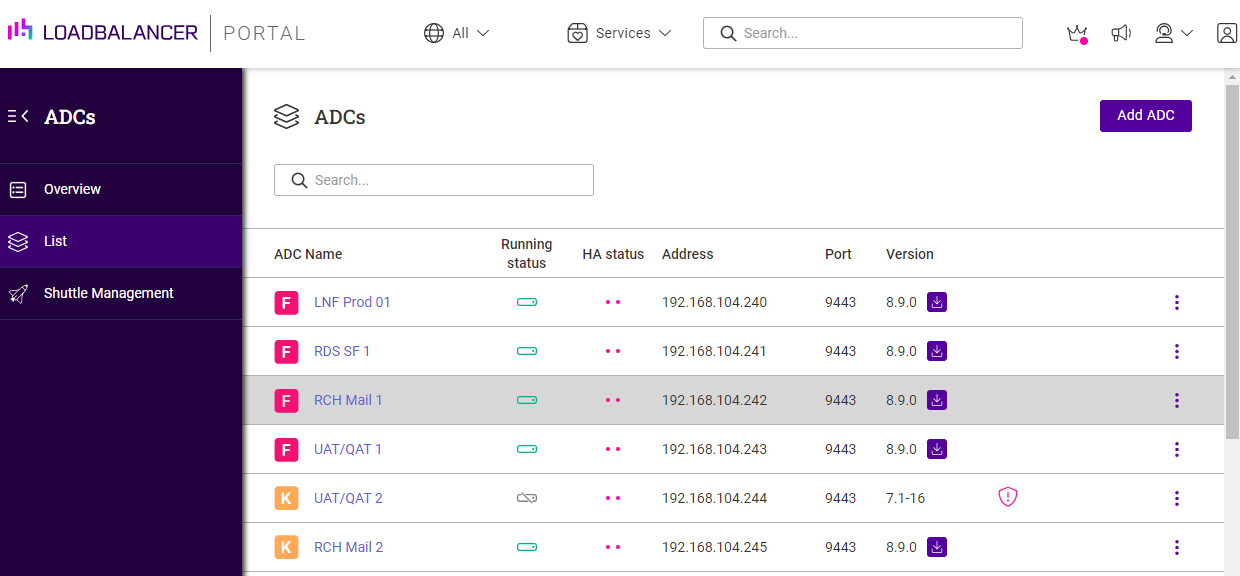
Which is why we're working hard on our cloud based ADC Portal to make maintenance, backup & recovery as easy as possible.
For ANY ADC appliance, yes thats right for F5, Citrix & Kemp as well...
And we'd love your feedback on how we can make this even better, so please comment on this blog, or phone/email/chat — but please let us know!
And finally an extra techy bit just for Linux users:
- Download the image file to your Linux box.
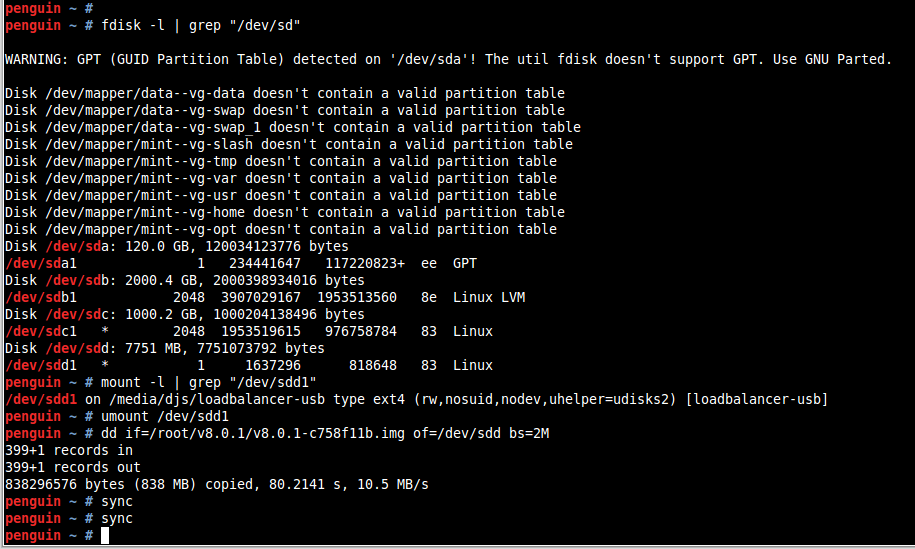
- Insert the USB stick use fdisk -l to work out where the USB stick is (no need to mount it, and if you have auto mount enabled, un-mount the drive) mount -lshould tell you if its mounted or not.
- Run the command - dd if=/imagefilename.img of=/dev/nameofusbdisk bs=2M Do not use /dev/sddx where x is a number, for example - /dev/sdd1 as this will install to a partition on your usb stick. Instead use the whole disk /dev/sdd (NOTE: Be careful using this command, if you specify your system disk not the USB stick as the of (output file) by accident this will write over your system disk and you will have to re-install your OS.)
- Once the dd command completes, run the sync command to ensure all data is written and flush file system buffers.
- Wait for it to complete and remove the USB stick.
And that's how to write the Loadbalancer.org image file using dd under Linux.


Load Balancing Exchange 2010 CAS Array with HAProxy (Quick Guide)

Related posts
Hardening HashiCorp Vault with load balancing for always-on security

What's the best cloud load balancer? AWS, Azure, GCP, Cloudflare, or a third-party alternative?

Architecting the perfect Christmas? A Highly Available light display!
How to load balance a MariaDB Galera Cluster for performance and HA using LVS & Ldirectord
HAProxy Enterprise Edition vs Progress Kemp LoadMaster: A no-fluff engineer comparison

Loadbalancer.org announces leadership transition and next phase of growth
ENVOY Proxy versus Loadbalancer.org: Why storage vendors need purpose-built load balancing for S3, NFS, and SMB

Architecting resilient object storage: Delivering multi-site capabilities for HPE with Loadbalancer.org GSLB