


Here at Loadbalancer, we’re always keen to give back to the community that writes such great software. Our new SNMP agents and MIBs for HAProxy make monitoring your Virtual Services and Real Servers a breeze.
A word of warning, SNMP can be a little bit awkward to configure in your monitoring tool of choice. You can easily give up when you are drowned by an avalanche of data...
I’ll start with describing how you use the SNMP MIB with the Loadbalancer.org appliance:
However, if you’re an open source geek - just scroll down to the section But, how do I use the Loadbalancer.org open source SNMP agent with HAProxy?
A simple example of how to monitor HAProxy SNMP statistics with PRTG
If you are using a Loadbalancer.org appliance running v8.5.0 or later of our software then the agents will be already installed. Prior versions relied on the simple yet effective perl script from Krzysztof Piotr Oledzki. We strongly recommend the new updated agent which supports unique IDs and a simple MIB based configuration for monitoring tools such as PRTG.
To make the appliance reachable to SNMP managers simply navigate to the 'Local Configuration' → 'SNMP Configuration'page on your loadbalancer’s WebUI and set the 'SNMP Community string':
Local Configuration → SNMP Configuration
You should then get to this page:
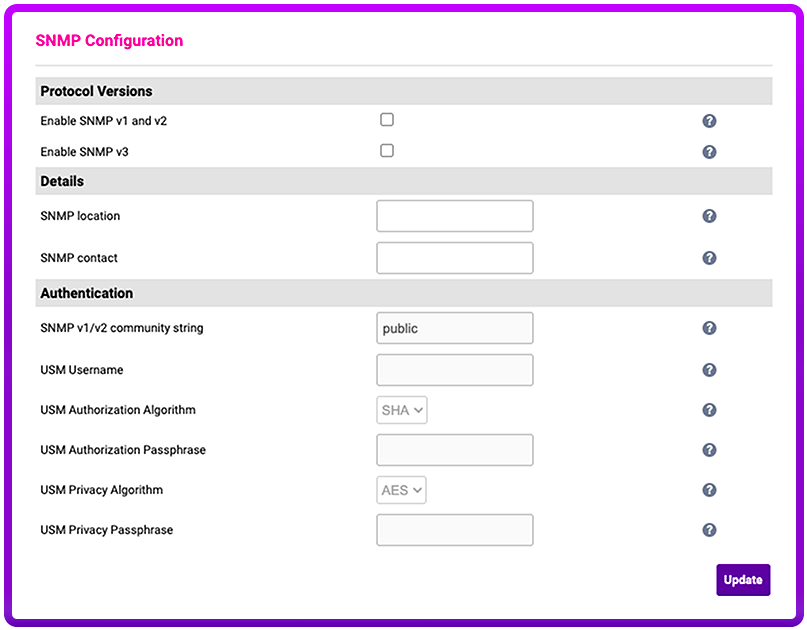
The community string is the password you will use to access the SNMP information on the load balancer. If you leave the password blank it will default to ‘public’.
After you press update, you will be prompted to restart SNMP - which then activates the service.
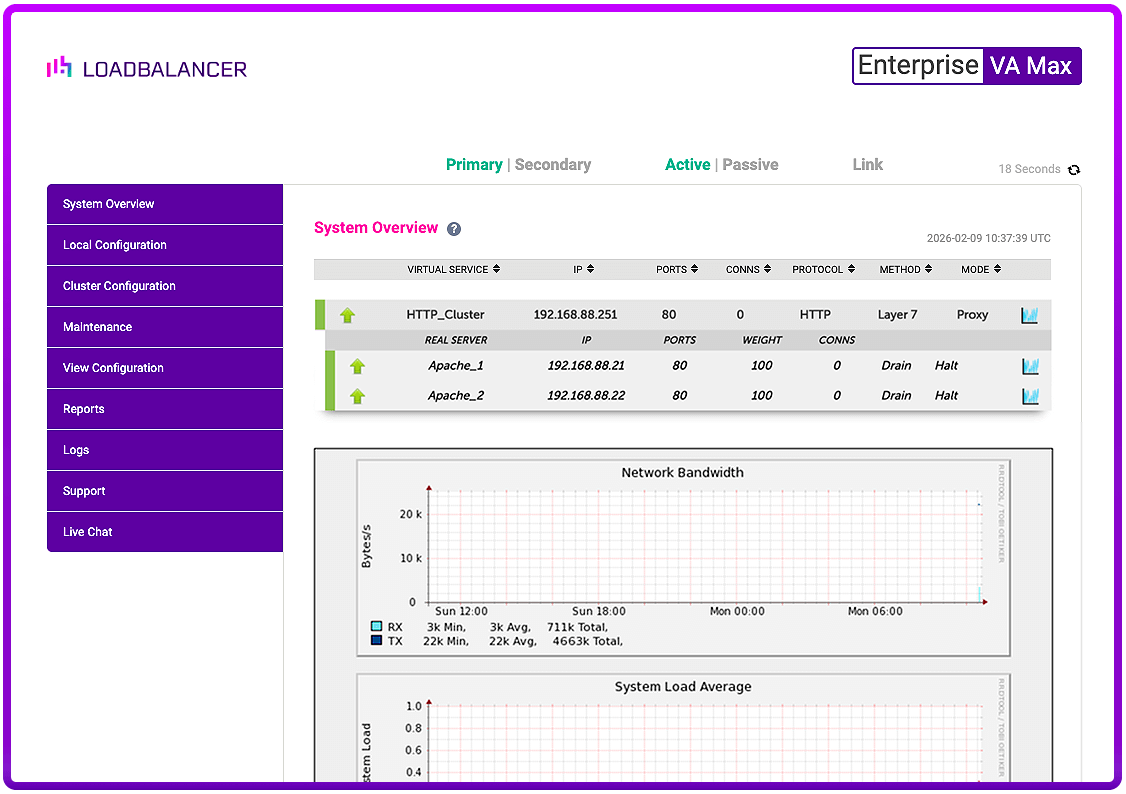
Our example cluster is pretty simple with just two servers:
The MIBs are located on our GitHub portal:
- Loadbalancer.org
- HAProxy SNMP agent
- Net SNMP LVS (Only needed for layer 4 - Linux Virtual Server SNMP)
These files will need to be uploaded to your PRTG server using the paeseller MIB installer.
Once you have the MIB importer installed you can then click and drag the files into the blank side of the client. You should get an import successful window, similar to below:

You can click 'Close' on this window.
You then want to click 'File' and 'Save Complete OIDLib' Name the OIDLIB to something sensible and then you can load up your PRTG web interface.
Once you have opened your PRTG web interface, navigate to your device list and add your loadbalancer.org appliance by specifying the management IP address and community string.
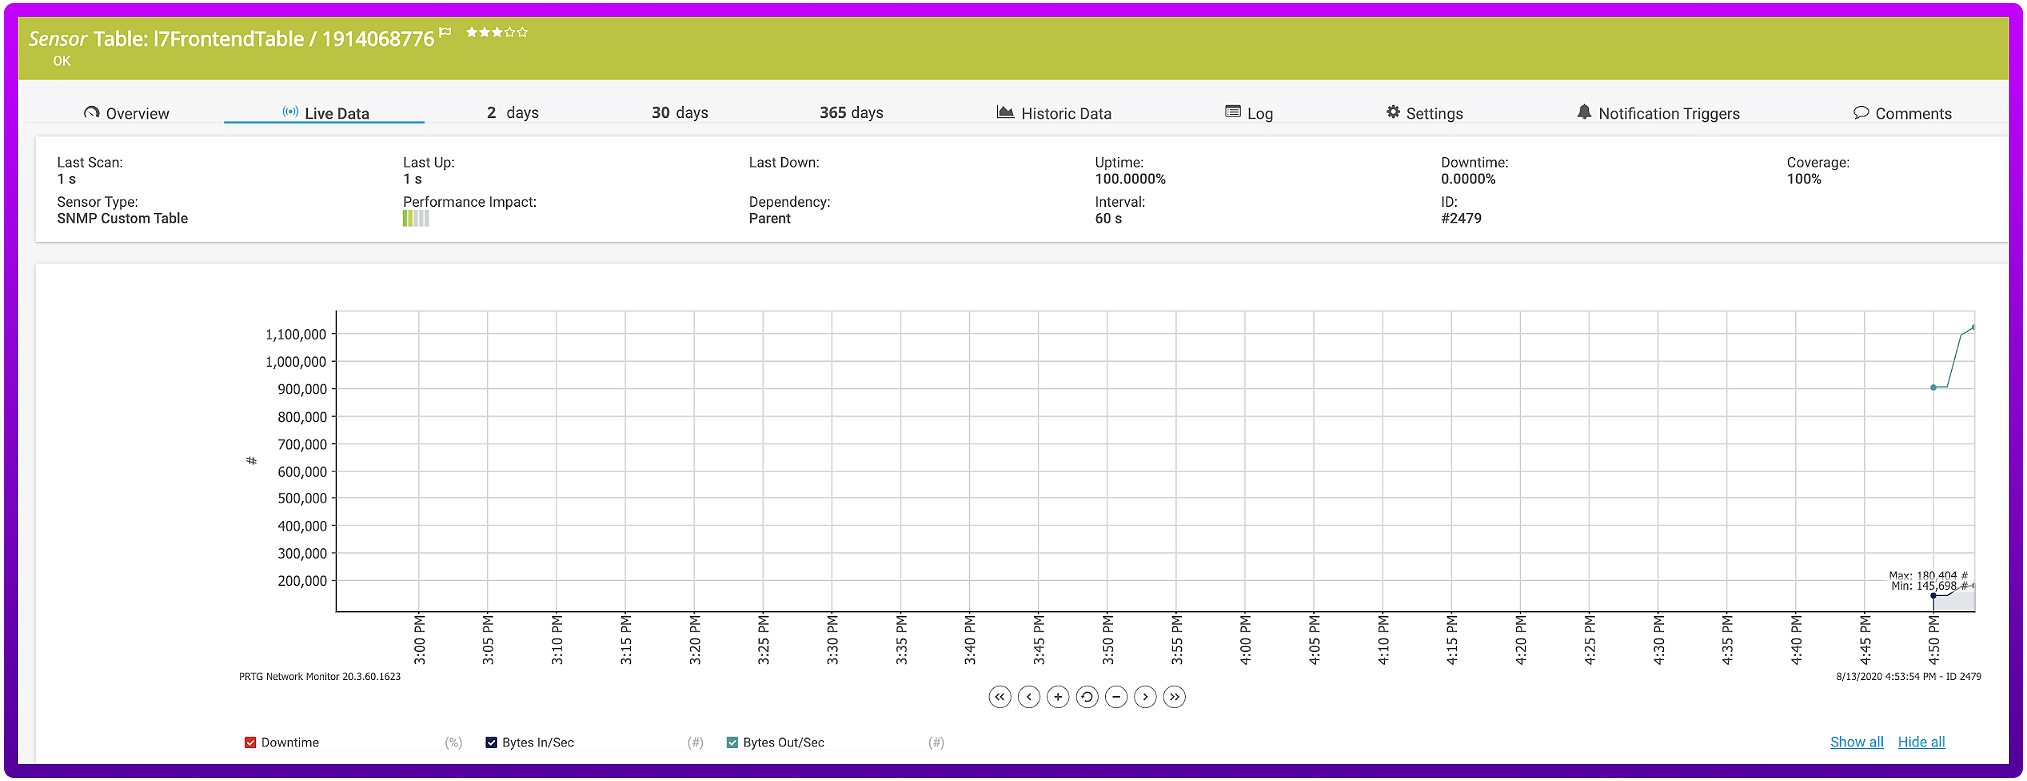
For the simple process level information you can use the sensor 'SNMP Library' Sensor and select the imported L7INFO OIDLib. This will quickly give you access to HAProxy Layer 7 process level information.
However the most useful information is in the 3 SNMP tables for front ends, back ends and servers. In order to access the tables you will need to select 'add sensor'and search for the sensor 'SNMP Custom Table'
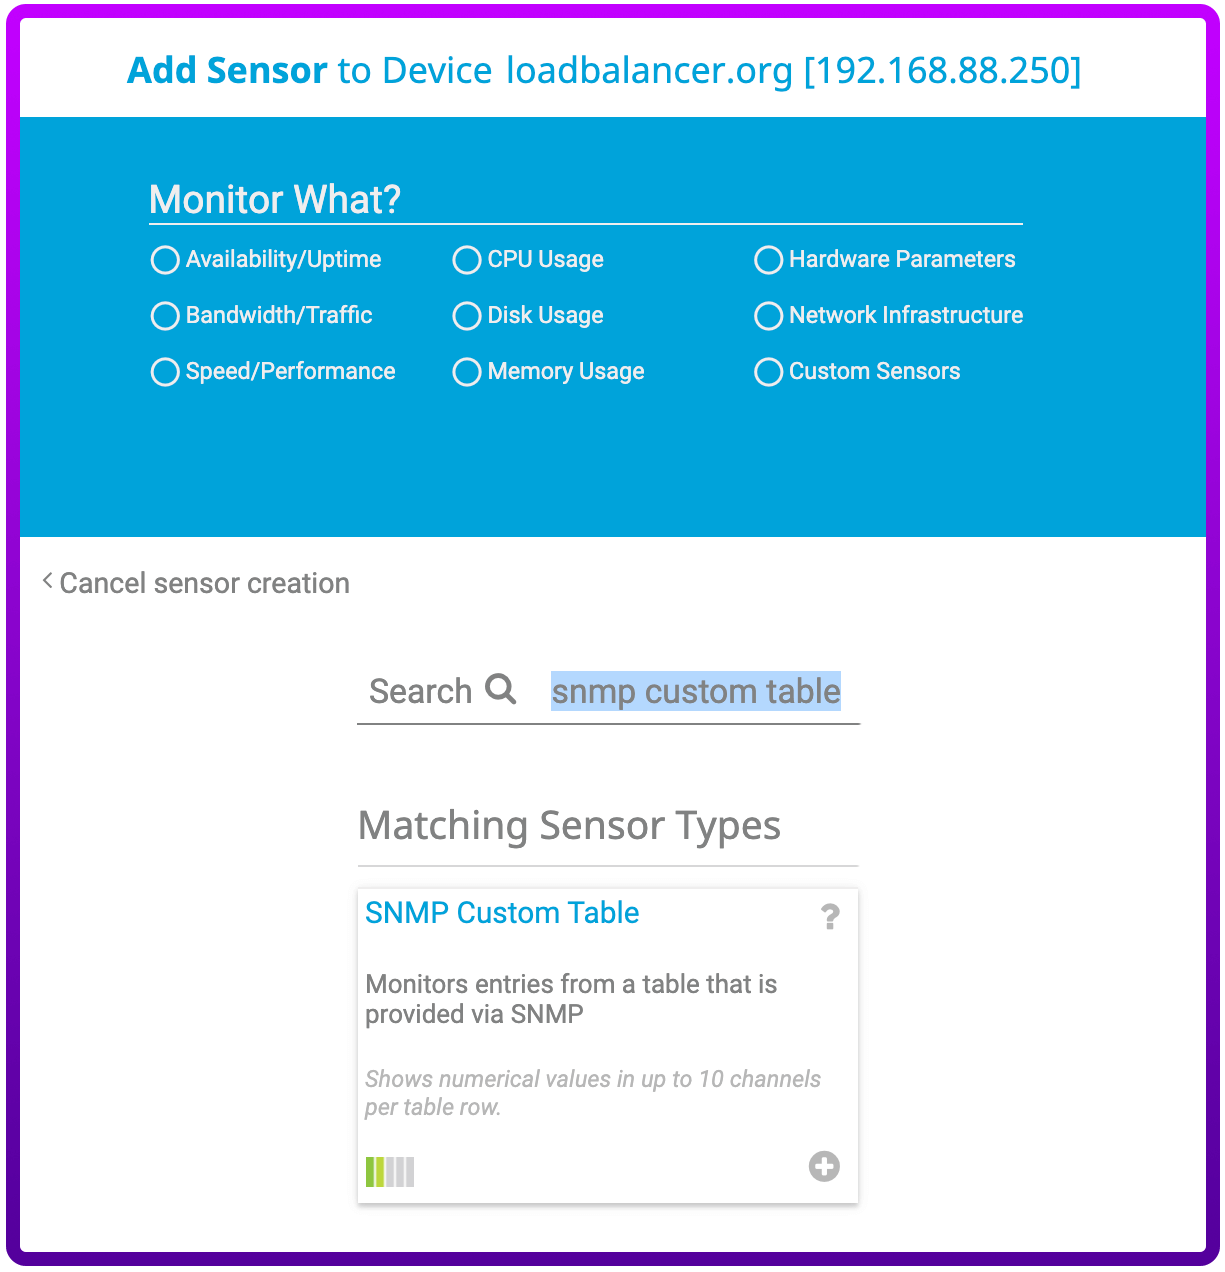
Unfortunately, the PRTG template doesn’t automatically list the uploaded MIB tables so you have to manually enter the L7Frontend Table OID: 1.3.6.1.4.1.54849.1.2.5
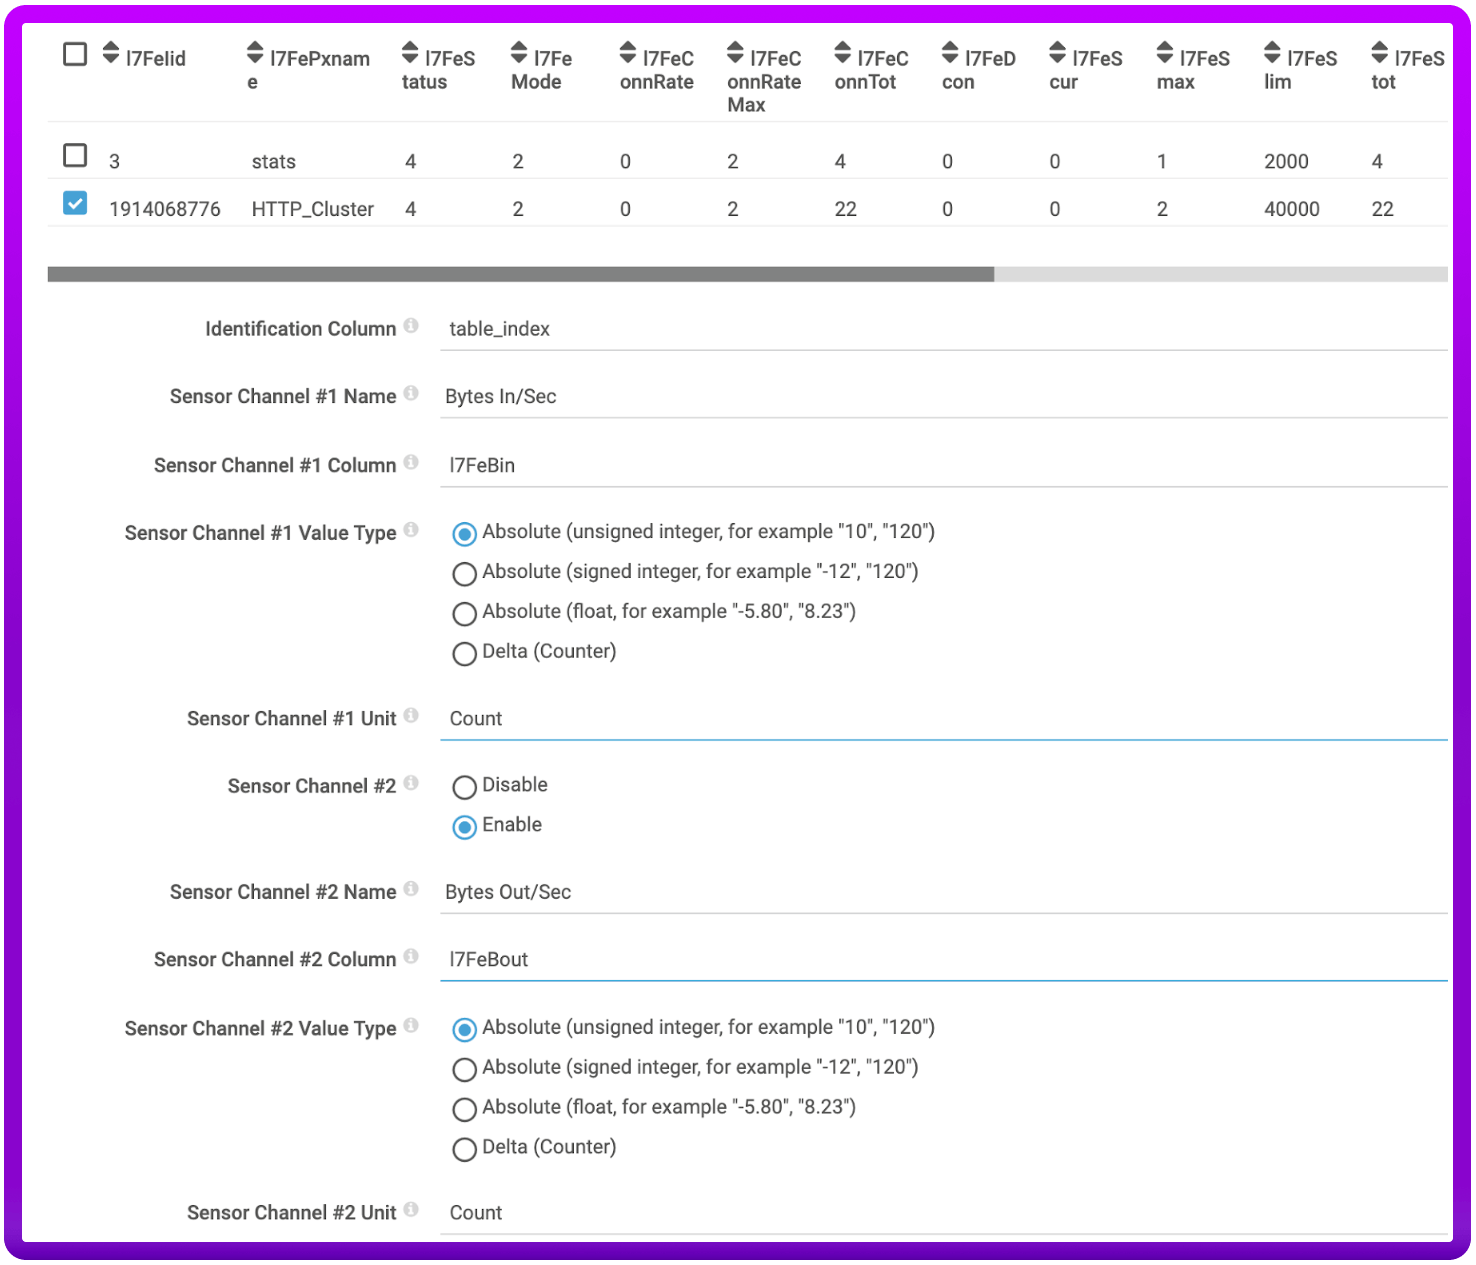
From here you are able to select the table you would like to monitor. In my case I tick the box next to the front end HTTP_Cluster.
Let’s add two sensors for our graph:
Sensor Channel #1 Name: Bytes In/Sec
Sensor Channel #1 Column: l7FeBin
Enable a second channel:
Sensor Channel #2 Name: Bytes Out/Sec
Sensor Channel #2 Column: l7FeBout
Then click on the blue create button.
Wait a few minutes for data to start being gathered (obviously you will need some test traffic through the cluster) - Click through to live data for the newly created L7FrontendTable... and 'hey presto' - we get a graph!
For reference, the other OIDs you will need are:
L7Backend: 1.3.6.1.4.1.54849.1.2.6
L7Server: 1.3.6.1.4.1.54849.1.2.7
As you can see - it's not that easy to get the first few sensors, but when you get used to it you can create a powerful monitoring environment with the tools of your choice.
Don't hesitate to start a discussion in the comments section of this blog - we always welcome feedback!
But, how do I use the Loadbalancer.org open source SNMP agent with HAProxy?
To build it: If you are using your own haproxy installation you will need to build the agents from source. You will need; git to fetch the repository, the re2c tool to generate the c source files, a c99 compiler such as gcc to build the shared objects. You will also need the net-snmp-config command from the NetSNMP distribution to supply the appropriate compiler and linker arguments for building a NetSNMP agent.
To install these prerequisites, simply run the following commands as root:
yum install epel-release
yum install git re2c gcc net-snmp-devel
Please note: different versions of NetSNMP have subtle variations in their internal ABI, in particular, but not limited to, the position and alignment of members within structures. Even if an agent compiled for a different version of NetSNMP appears to load and run there is no guarantee that it will work correctly. To avoid these troubles it's best to build on the machine that you will deploy the agent on (i.e. the server that hosts your HAProxy instance) - or, if that is not possible, on a machine with an identical NetSNMP installation.
- Get the sources from github by running: git clone
- Change to the newly created haproxy-snmp-agent directory.
- If you are using a GNU toolchain simply run 'make all' otherwise inspect the contents of GNUmakefile and run the appropriate commands for your toolchain.
- Copy the resulting shared libraries to an appropriate directory (/usr/local/lib for example) where they can be read by snmpd.
- Edit your snmpd configuration file (usually /etc/snmp/snmpd.conf) to add the dlmod directives to load the agents. The dlmod directive takes the name of an ‘entry point’ function to call in the dynamically loaded library and a path to the library itself as arguments.
The entry points for the new agents are l7info and l7stat, so if you copied the libraries to /usr/local/lib in the previous step then the the appropriate lines would be:
dlmod l7info /usr/local/lib/libl7info.so
dlmod l7stat /usr/local/lib/libl7stat.so
- Restart snmpd.
If the SNMP daemon has trouble loading the agent (if you get messages similar to 'dlopen failed: /usr/local/lib/libl7info.so: cannot open shared object file: Permission denied' for example) make sure you have the correct permissions set including the appropriate SELinux/AppArmor settings for your distribution.
Testing: To test the agents it is usually easiest to use the snmpwalk and snmptable commands from the NetSNMP distribution (depending on your distribution you may need to install the net-snmp-utils package, the snmp package or another similar package).
You can install these commands by running the following command as root:
yum install net-snmp-utils
You will need to configure the pre-compiled NetSNMP clients to read and parse the new MIBs if they are not already configured to do so. Copy the files LBO-MIB.txt, L7INFO-EXPERIMENTAL-MIB.txt and L7STAT-EXPERIMENTAL-MIB.txt to the MIB directory on your client machine (usually /usr/share/snmp/mibs).
To configure the clients to parse all MIBs that they find add the following line to /etc/snmp/snmp.conf:
mibs +ALL
To instead configure only the new MIBs add the following line to /etc/snmp/snmp.conf:
mibs +LBO-MIB:L7INFO-EXPERIMENTAL-MIB:L7STAT-EXPERIMENTAL-MIB
To test the Layer 7 Info agent just type the following at the console, replacing community and hostname with the appropriate values for your SNMP server:
snmpwalk -v 2c -c [community] [hostname] l7Info | less -S
This gives a similar output to the familiar HAProxy 'show info' command. More granular information from the Layer 7 Statistics agent is available in 3 separate tables:
snmptable -v 2c -c [community] [hostname] l7Frontend | less -S
snmptable -v 2c -c [community] [hostname] l7Backend | less -S
snmptable -v 2c -c [community] [hostname] l7Server | less -S
Let's look in more detail at the output from the l7Server table for our example cluster:
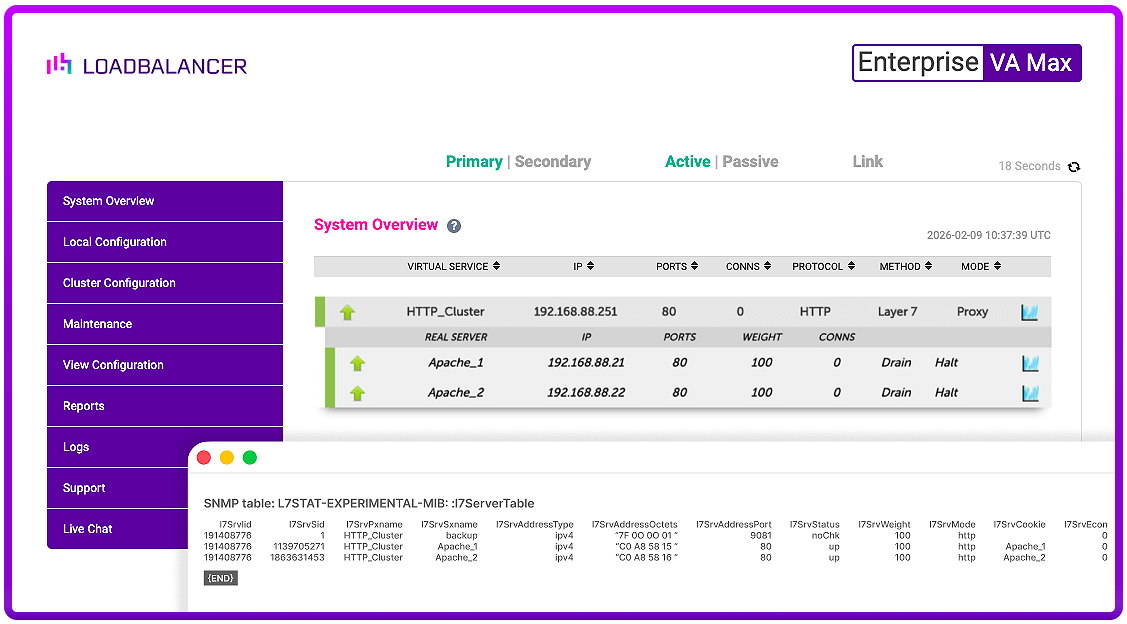
You can see in this screenshot that there are a lot of different counters here - they scroll right off the screen. You can get all the standard information that you can find from the highly detailed HAProxy statistics page…
But let's concentrate on the ones that are useful for graphing connections and throughput.
You will usually be interested in the Frontend Counters for each cluster:
l7FeConnRate
l7FeBin
l7FeBout
And of course individual server counters within each backend:
l7SrvScur
l7SrvBin
l7SrvBout
Don't hesitate to start a discussion in the comments section at the foot of this blog - we always welcome an argument :-).
If you're one of our existing customers and have any further questions, please contact our support team by emailing support@loadbalancer.org and we'll get back to you.
Reference Material
Open Source HAProxy monitoring options:
Commercial HAProxy SNMP monitoring options:

Making a leading charity’s email system secure, accessible and reliable


Related posts
When is an ACL not an ACL? When it's an HAProxy ACL...
Using Grafana Loki with HAProxy for log aggregation

Extending the ModSecurity WAF, with Denial Of Service protection — using HAProxy

The MSP guide to rate limiting Hitachi Vantara object storage with HAProxy
HAProxy Enterprise Edition vs Progress Kemp LoadMaster: A no-fluff engineer comparison

Loadbalancer.org announces leadership transition and next phase of growth
ENVOY Proxy versus Loadbalancer.org: Why storage vendors need purpose-built load balancing for S3, NFS, and SMB

Architecting resilient object storage: Delivering multi-site capabilities for HPE with Loadbalancer.org GSLB
