


Remember when IPv4 addresses seemed confusing? Those were simpler times, my friend. Back then, we only had to remember four numbers separated by dots. Easy-peasy. Then IPv6 came along with addresses that look like someone let a toddler loose on a hexadecimal keyboard:
2001:0db8:85a3:0000:0000:8a2e:0370:7334
But fear not! Today we're going to show you how Loadbalancer.org makes IPv6 configuration so simple, even your network switch would be impressed.
Want more tips and tricks?
Load balancing how-tos
IPv6: The protocol that's finally having its moment
IPv6 has been around for over 25 years, patiently waiting in the wings like an understudy who's finally getting their big break. With 2^128 possible addresses (that's roughly 340 undecillion, or enough addresses to give every grain of sand on Earth about 3 billion IP addresses each), IPv6 is basically the networking equivalent of having infinite closet space.
And yes, those addresses look intimidating. But here's the thing: IPv6 addresses are like that really smart friend who looks complicated but is actually quite logical once you get to know them. Plus, you can compress them! That monster address:
2001:0db8:85a3:0000:0000:8a2e:0370:7334
becomes the much more manageable:
2001:db8:85a3::8a2e:370:7334
See? IPv6 has a sense of style.
Configuring IPv6 on Loadbalancer.org: Easier than explaining why we ran out of IPv4 addresses
Let's get down to business. Configuring IPv6 on your Loadbalancer.org appliance is so straightforward, you'll wonder why you've been putting it off.
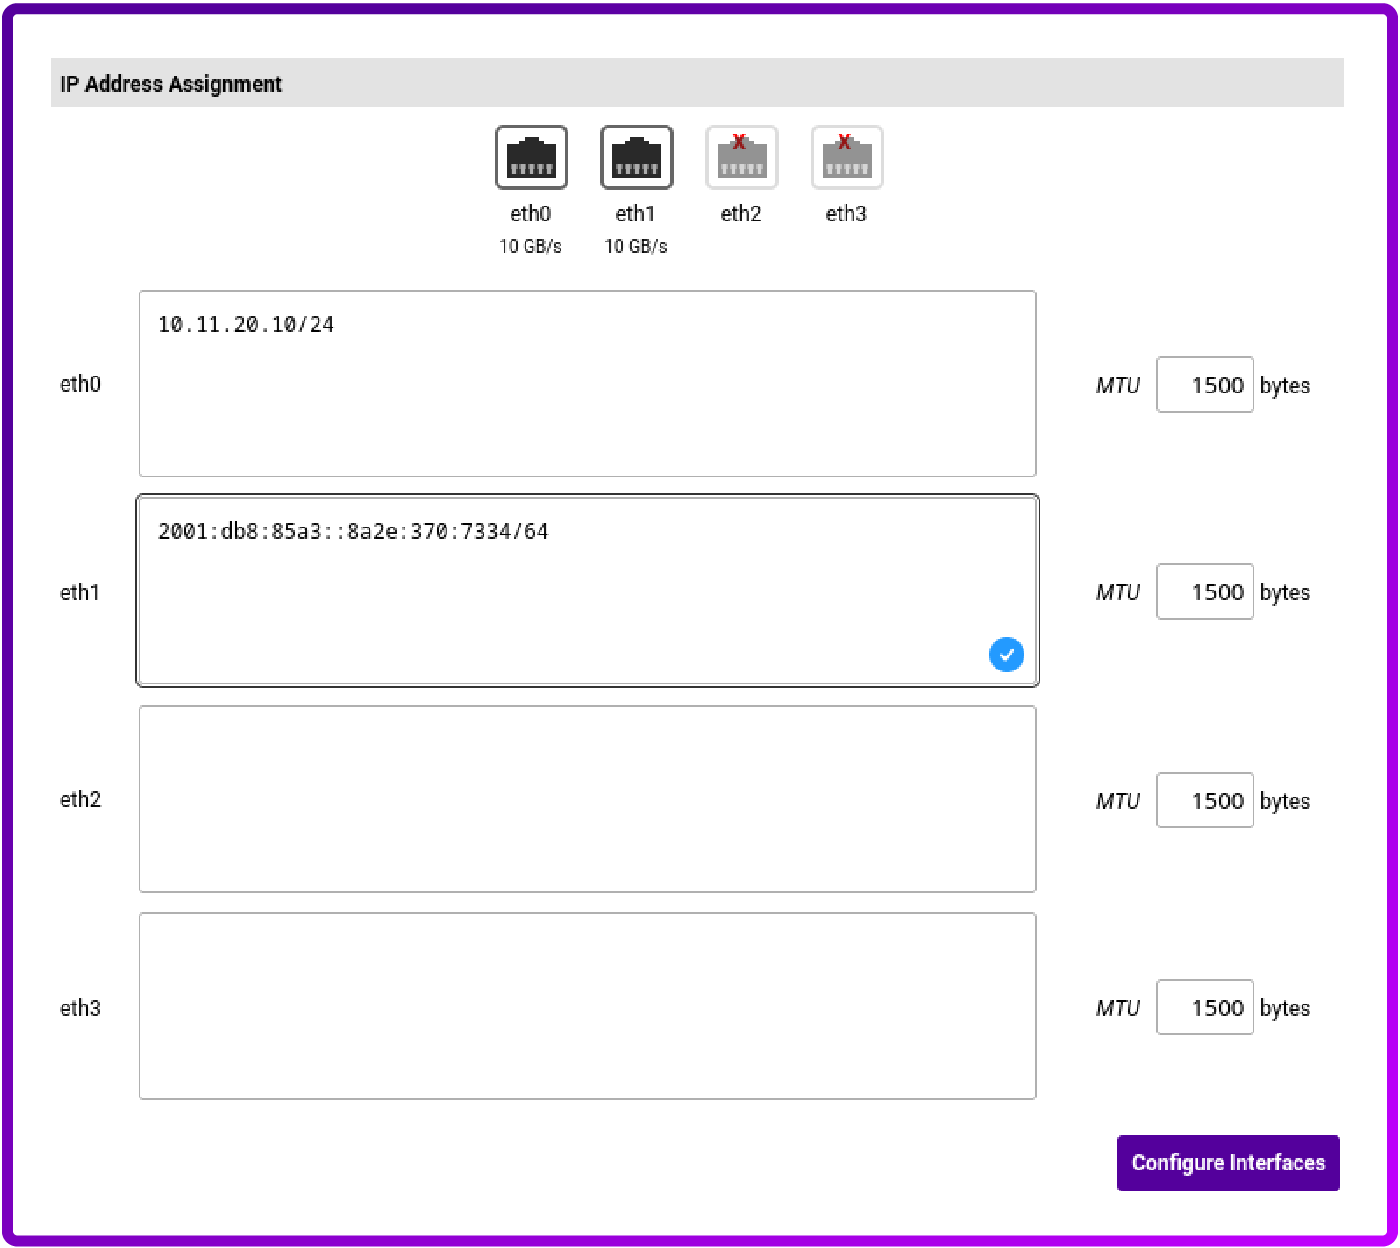
Step 1: Give your appliance an IPv6 Identity
Navigate to Local Configuration → Network Interface Configuration and select your interface. It's like picking a name tag at a networking event, except this name tag has colons and hexadecimal digits.
Enter your IPv6 address with its prefix length:
2001:db8:85a3::8a2e:370:7334/64
And click Configure Interfaces button.
Pro tip! If you're running a cluster (and who isn't these days?), remember that each node needs its own unique address. Think of it like assigning parking spaces – everyone gets their own spot:
- Primary node:
2001:db8:85a3::8a2e:370:7334/64
- Secondary node:
2001:db8:85a3::8a2e:370:7335/64
And yes, IPv6 addresses are case-insensitive, but we recommend lowercase because SHOUTING IN IPv6 IS JUST AS ANNOYING AS SHOUTING IN EMAILS.
Load Balancing IPv6 traffic: Layer 4 edition
Now for the fun part – actually load balancing some traffic! We'll start with a Layer 4 NAT configuration because, let's face it, sometimes you just want to keep things simple.
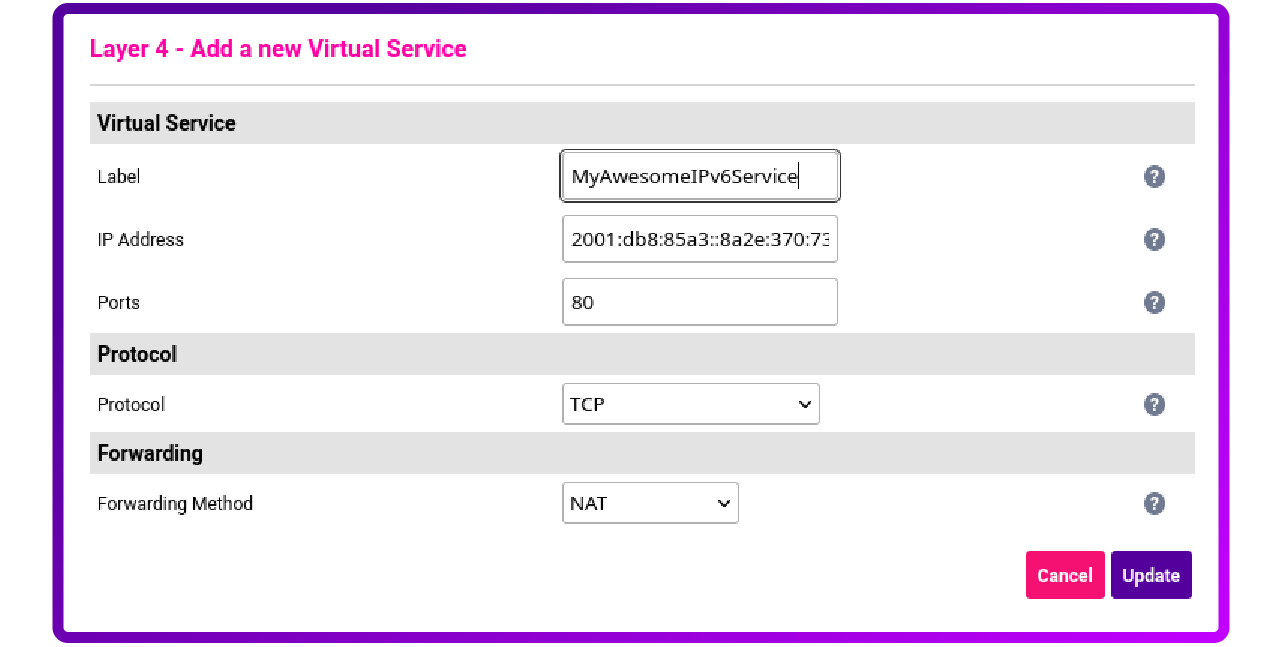
Step Two: Create your virtual service
Head over to Cluster Configuration → Layer 4 - Virtual Services and create a new service:
- Label: Something memorable (like "MyAwesomeIPv6Service")
- IPv6 Address:
2001:db8:85a3::8a2e:370:7336
- Port: 80 (because port 80 is the networking equivalent of a comfortable pair of jeans)
- Protocol: TCP
- Forwarding Method: NAT
Click Update and pat yourself on the back – you're officially load balancing IPv6 traffic!
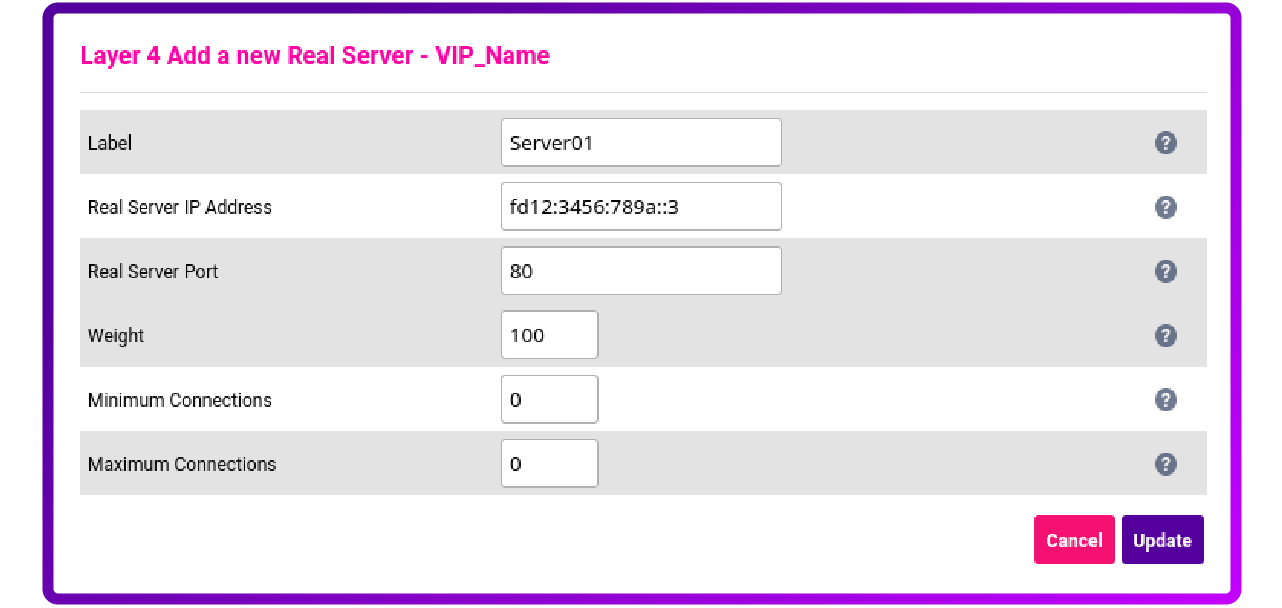
Step Three: Adding Real Servers
Now add your real servers via Cluster Configuration → Layer 4 - Real Servers. Give them labels and IPv6 addresses, because every server deserves a proper introduction.
Important note: Since we're using NAT mode, your servers need to know how to get back home. Set their default gateway to your Loadbalancer.org appliance's IPv6 address. If you're using a cluster (and you should be, because redundancy is like having a backup generator for your backup generator), make sure you're using a Floating IP.
Voilà! Your IPv6 load balancing setup is ready to handle traffic like a seasoned maître'D, directing customers to tables.
Layer 7 HTTP load balancing: The plot twist
But wait, there's more! (I promise this isn't a late-night infomercial.) Layer 7 load balancing with IPv6 is where things get fascinating – and by interesting, I mean "surprisingly easy".
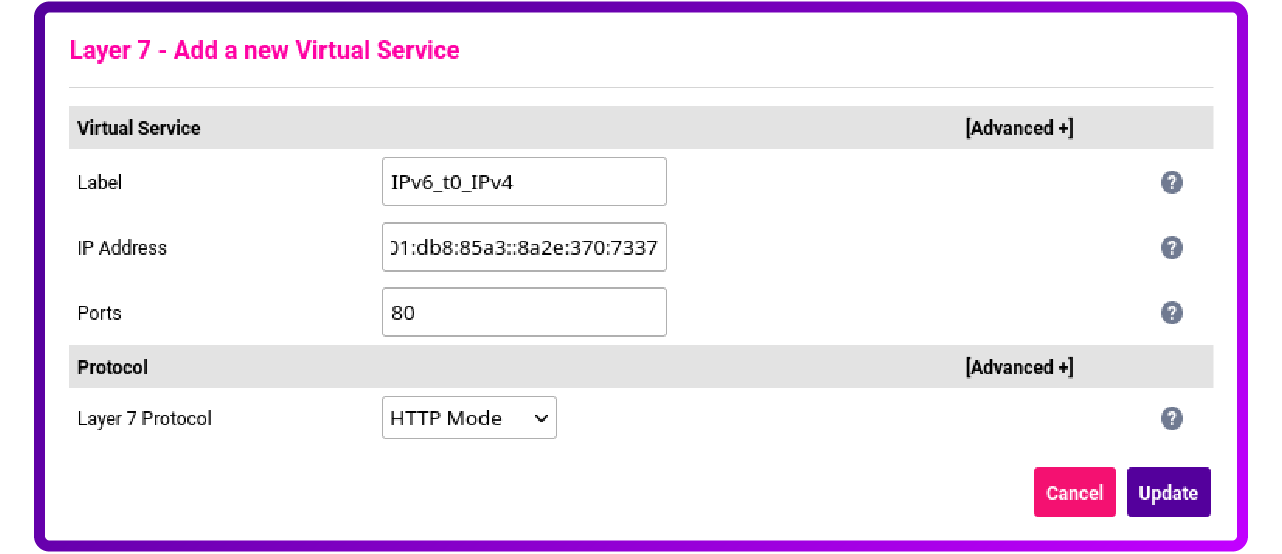
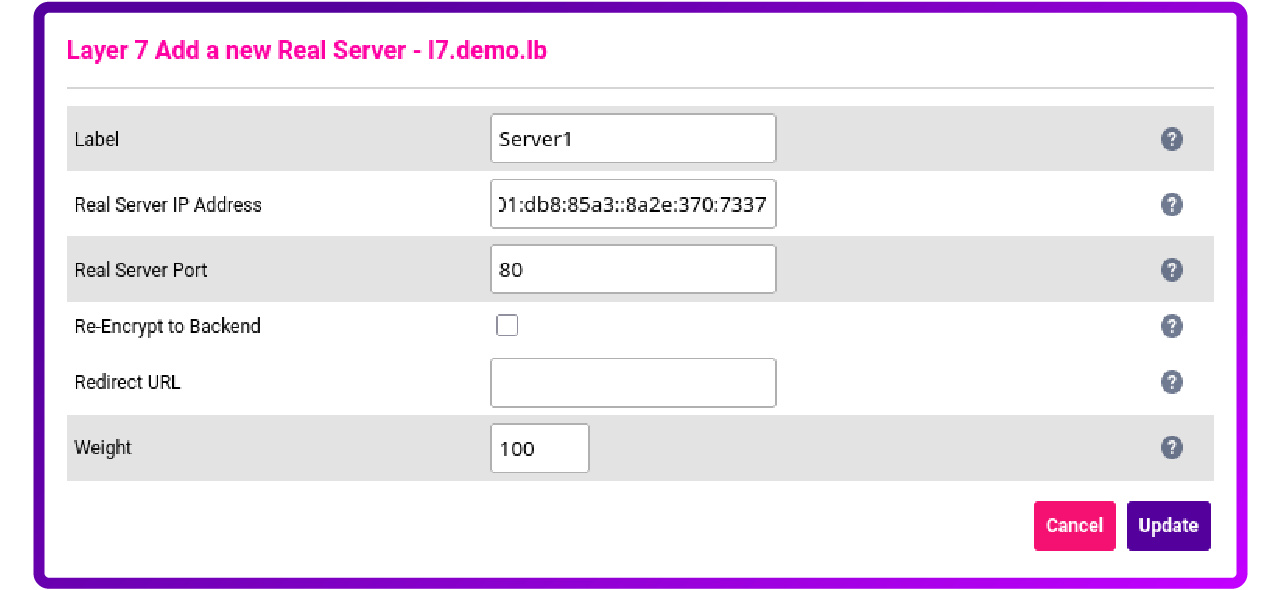
Step Four: IPv6 to IPv4 Translation: The Universal Translator
Create a new Virtual Service under Cluster Configuration → Layer 7 - Virtual Services:
- IPv6 Address:
2001:db8:85a3::8a2e:370:7336
- Port: 80
- Protocol: HTTP
Here's the magic: your real servers can use IPv4 addresses! That's right – your shiny new IPv6 frontend can talk to your legacy IPv4 backend servers. It's like having a translator at a United Nations meeting, except less formal and more reliable.
Add your real servers with their IPv4 addresses under Layer 7 - Real Servers, and since Layer 7 is a full proxy, your backend servers don't need to know anything changed. They'll just keep doing their thing while your load balancer handles all the IPv6 magic behind the scenes.
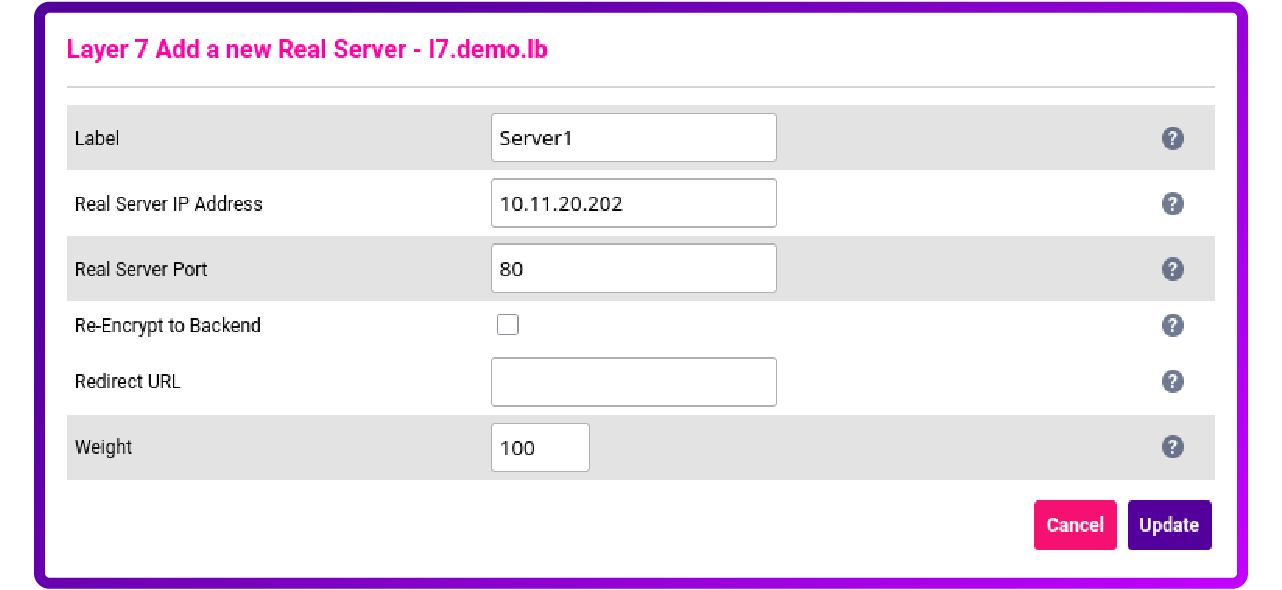
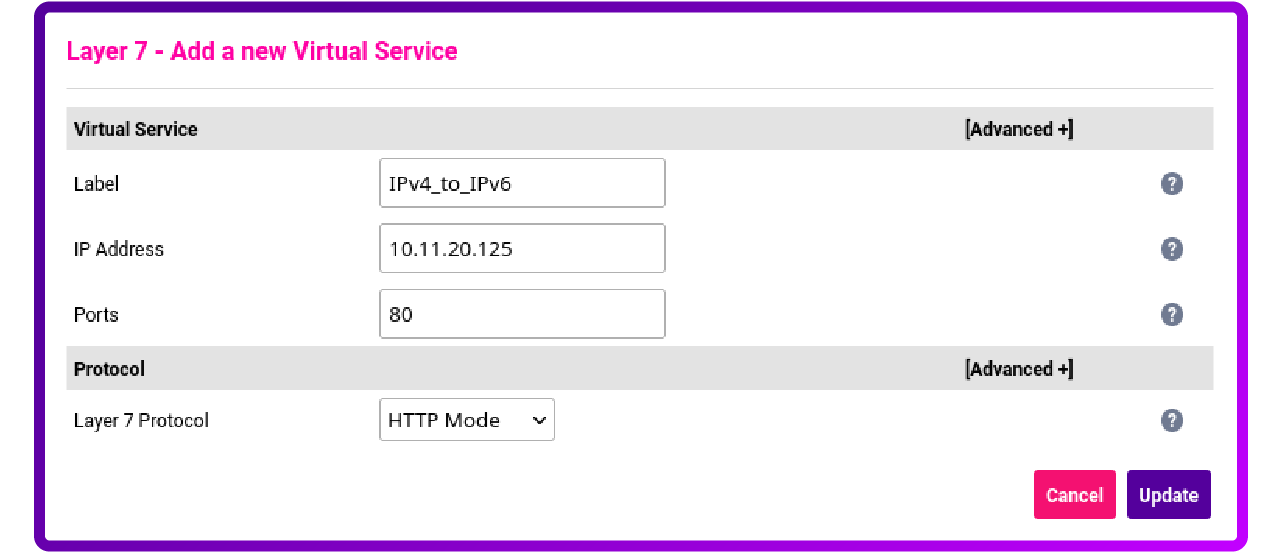
Step Five: Going the Other Way: IPv4 to IPv6
Because Loadbalancer.org believes in equal opportunity networking, you can also do this in reverse:
- Virtual Service: IPv4 address (like 192.168.1.1)
- Real Servers: IPv6 addresses
- Result: Your IPv4 clients can seamlessly access IPv6 services
It's networking diplomacy at its finest.
The bottom line: IPv6 doesn't have to be scary
Look, we get it. IPv6 addresses look like someone sneezed while typing hexadecimal. But with Loadbalancer.org, configuring IPv6 load balancing is about as complicated as making toast – and significantly more useful for your network infrastructure.
Whether you're doing Layer 4 NAT configuration or Layer 7 HTTP load balancing with IP translation, Loadbalancer.org makes it simple enough that you can set it up during your coffee break. And with 340 undecillion IPv6 addresses at your disposal, you'll never have to worry about running out of IP space again.
So go ahead, embrace the future of networking. Your IPv6 addresses might look intimidating, but they're just waiting to be part of your beautifully load-balanced infrastructure.
After all, if we can figure out how to make IPv6 work seamlessly with IPv4, surely we can figure out anything. Right?
Now, if someone could just explain to me why we need 340 undecillion addresses when there are only about 8 billion people on the planet...but that's a blog post for another day ; )
Ready to give IPv6 a try with Loadbalancer.org? Your network (and your future self) will thank you. Plus, you'll finally have something interesting to talk about at networking meetups.