Benefits of load balancing SUSE Rancher
Load balancing SUSE Rancher is essential for managing and optimizing the performance of containerized applications. It ensures that traffic is efficiently distributed across your Kubernetes clusters, providing several key benefits:
- High availability and reliability: Load balancing is crucial for high availability. By spreading incoming traffic across multiple application instances (pods), it eliminates a single point of failure. If one pod becomes unhealthy or fails, the load balancer automatically reroutes traffic to the remaining healthy pods, preventing downtime. This ensures the application remains available and responsive to users.
- Improved performance and scalability: As application traffic increases, a single pod can become overwhelmed by requests. Load balancing helps horizontally scale applications by distributing the workload across more pods. This prevents performance issues and ensures that applications can handle the increase in demand. SUSE Rancher integrates with Kubernetes’ native scaling capabilities, like the Horizontal Pod Autoscaler, to automate this process.
- Efficient resource utilization: Load balancing optimizes resource utilization by evenly distributing traffic across clusters. By evenly distributing traffic, it prevents certain nodes from being overutilized, while others lie underutilized. This optimization leads to better performance and can reduce costs by ensuring infrastructure is being leveraged to its full potential
About SUSE Rancher
SUSE Rancher is a powerful open source, enterprise-grade platform for managing Kubernetes clusters. It simplifies container adoption and helps organizations get the most out of their deployments, streamlining Kubernetes operations.
It offers a single, easy-to-use interface to deploy, secure, and manage Kubernetes clusters wherever they are—whether in a data center, the cloud, or at the edge.
Why Loadbalancer.org for SUSE Rancher?
Loadbalancer’s intuitive Enterprise Application Delivery Controller (ADC) is designed to save time and money with a clever, not complex, WebUI.
Easily configure, deploy, manage, and maintain our Enterprise load balancer, reducing complexity and the risk of human error. For a difference you can see in just minutes.
And with WAF and GSLB included straight out-of-the-box, there’s no hidden costs, so the prices you see on our website are fully transparent.
More on what’s possible with Loadbalancer.org.
How to load balance SUSE Rancher
The load balancer can be deployed in four fundamental ways: Layer 4 DR mode, Layer 4 NAT mode, Layer 4 SNAT mode, and Layer 7 Reverse Proxy (Layer 7 SNAT mode).
For SUSE Rancher, Layer 7 Reverse Proxy is recommended.
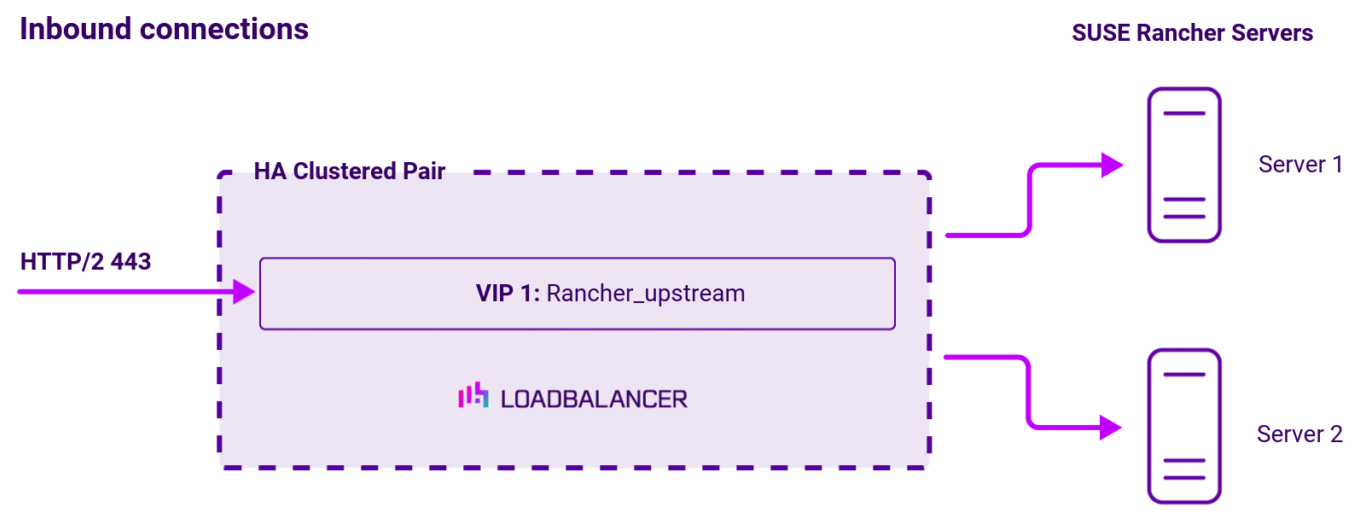
Virtual service (VIP) requirements
To provide load balancing and HA for SUSE Rancher, the following VIPs are required:
| Ref | VIP name | Mode | Port(s) | Persistence mode | Health check |
|---|---|---|---|---|---|
| VIP 1 | Rancher_upstream | Layer 7 Reverse Proxy (HTTP/2) | 443 | HTTP cookie | Connect to Port |
Load balancing deployment concept
Once the load balancer is deployed, clients connect to the Virtual Services (VIPs) rather than connecting directly to one of the SUSE Rancher servers. These connections are then load balanced across the SUSE Rancher servers to distribute the load according to the load balancing algorithm selected.
Note
The load balancer can be deployed as a single unit, although Loadbalancer.org recommends a clustered pair for resilience and high availability.
Load balancing topology
Layer 7 Reverse Proxy can be deployed using either a one-arm or two-arm configuration. For two-arm deployments, eth1 is typically used for client side connections and eth0 is used for Real Server connections, although this is not mandatory since any interface can be used for any purpose.
For more on one and two-arm topology see Topologies & Load Balancing Methods.
About Layer 7 Reverse Proxy load balancing
Layer 7 Reverse Proxy uses a proxy (HAProxy) at the application layer. Inbound requests are terminated on the load balancer and HAProxy generates a new corresponding request to the chosen Real Server. As a result, Layer 7 is typically not as fast as the Layer 4 methods. Layer 7 is typically chosen when either enhanced options such as SSL termination, cookie based persistence, URL rewriting, header insertion/deletion etc. are required, or when the network topology prohibits the use of the Layer 4 methods. The image below shows an example network diagram for this mode.
The image below shows an example Layer 7 Reverse Proxy network diagram:
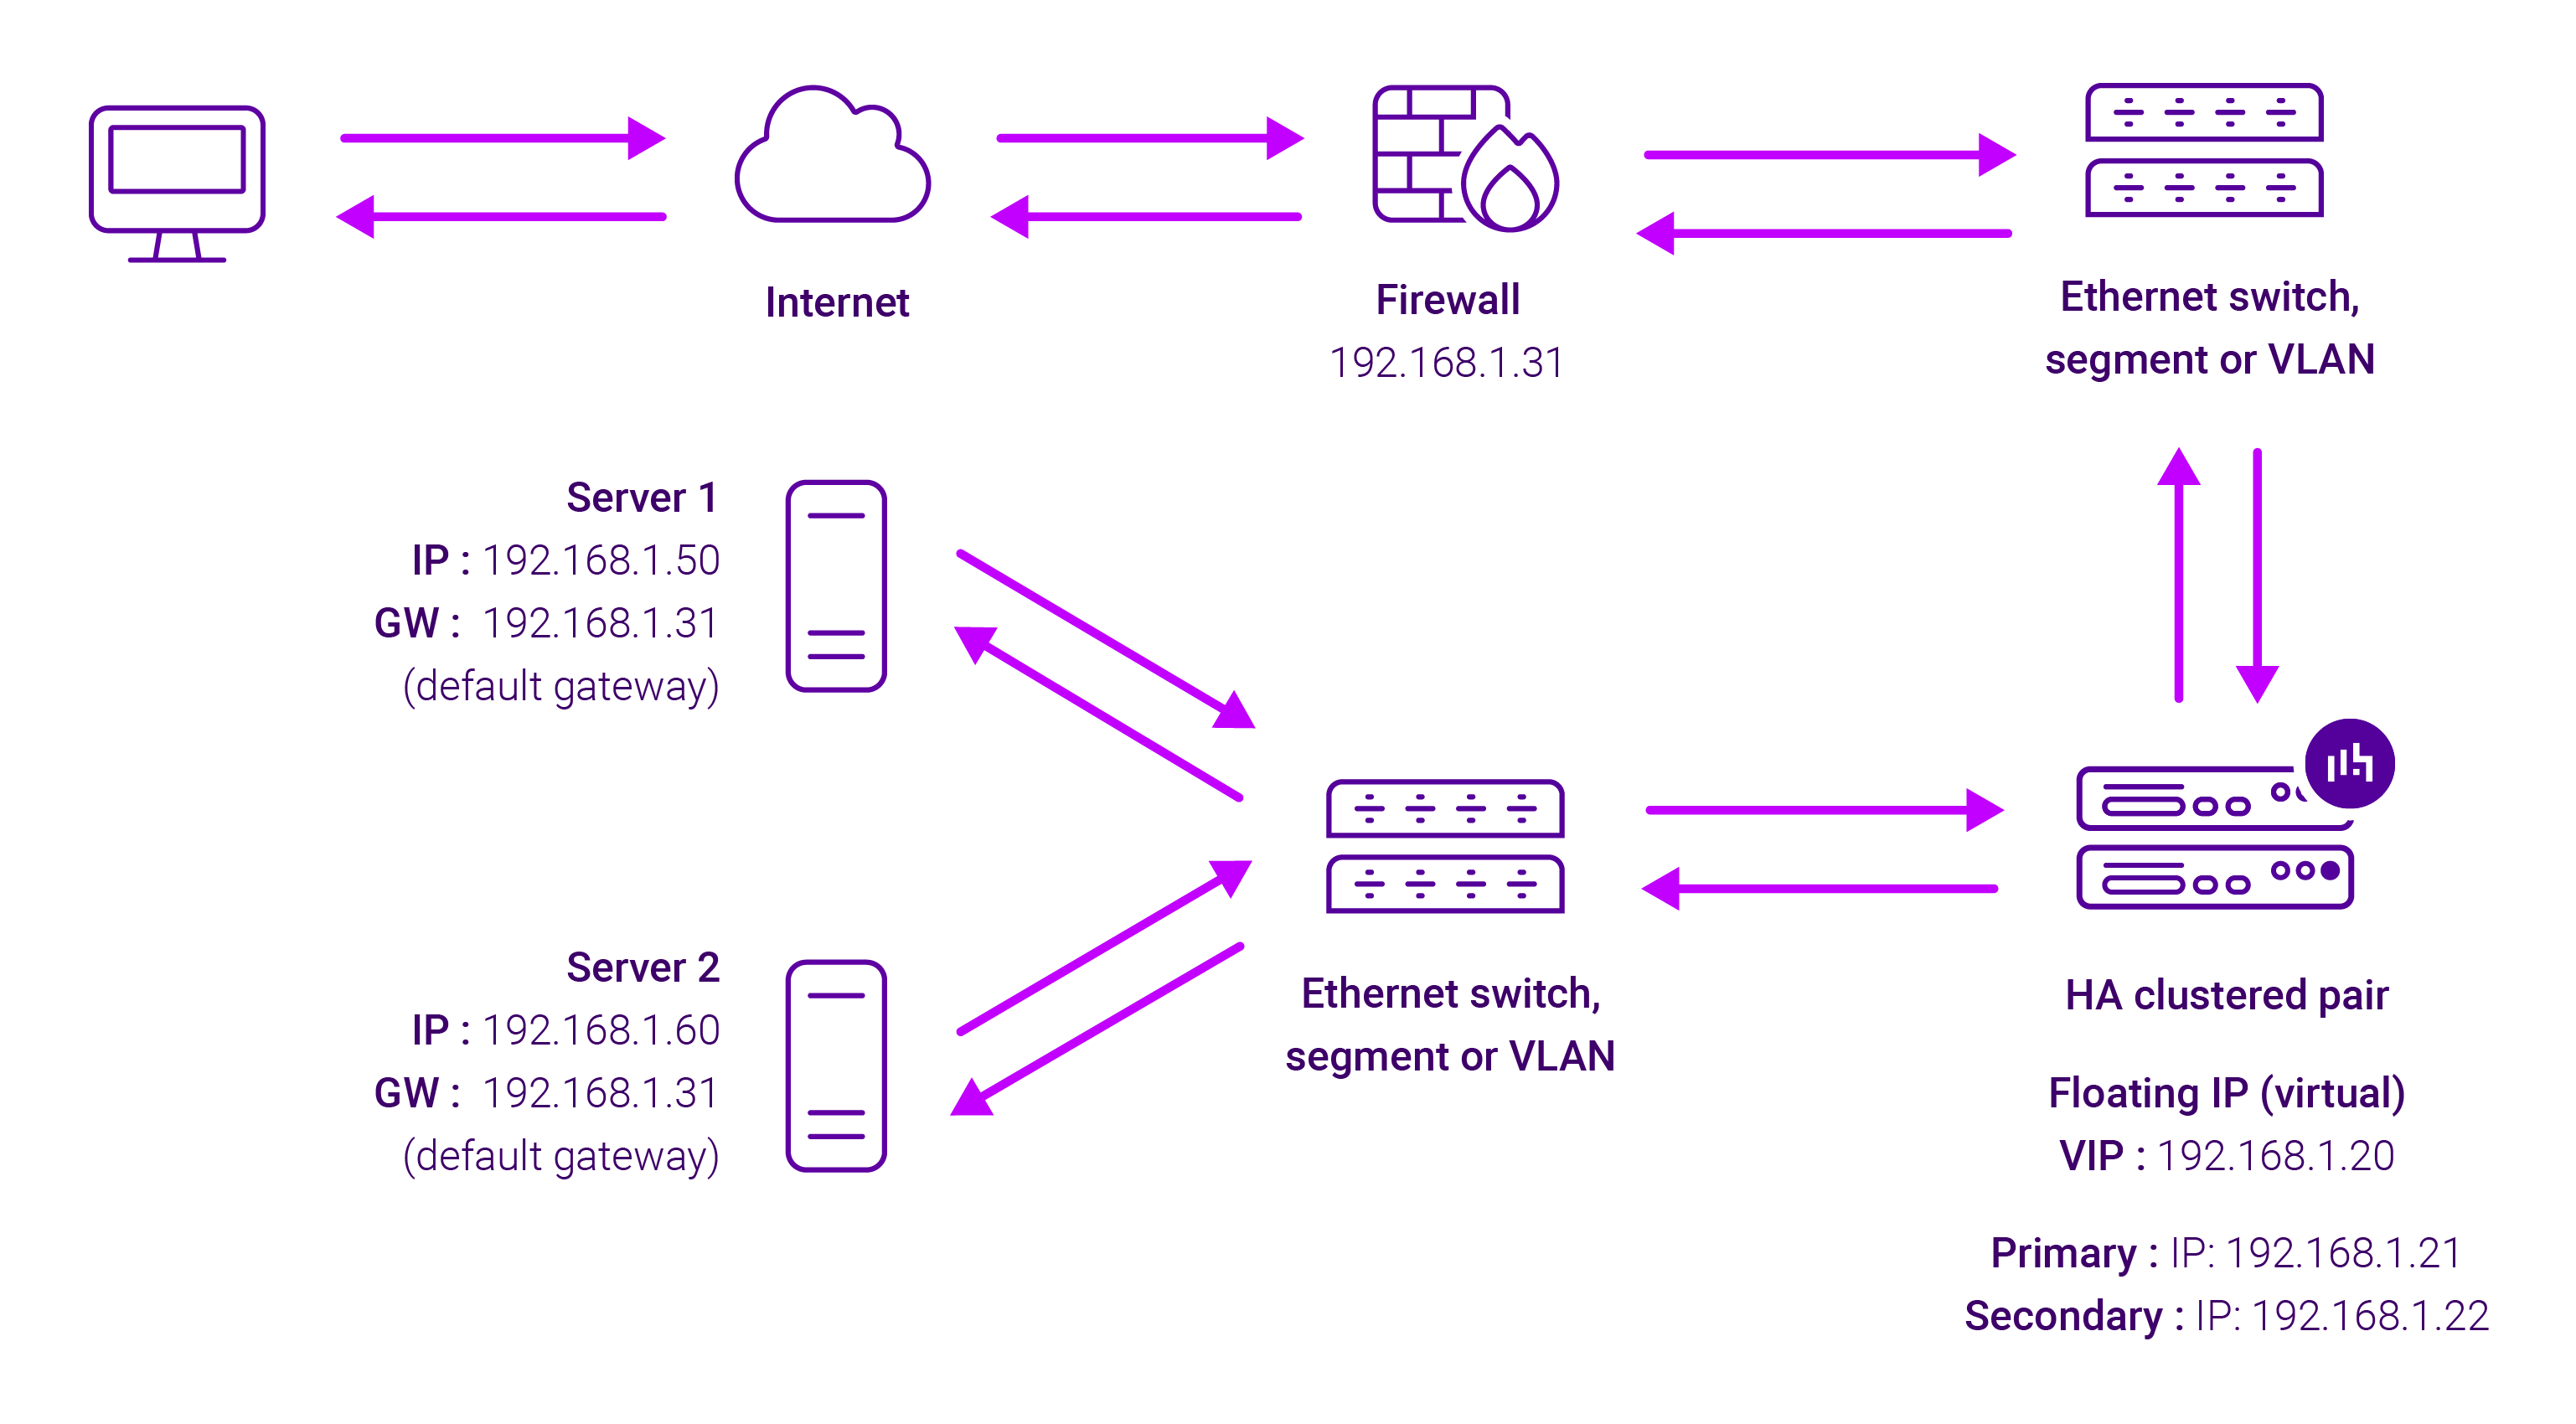
Because Layer 7 Reverse Proxy is a full proxy, Real Servers in the cluster can be on any accessible network including across the Internet or WAN.
Layer 7 Reverse Proxy is not transparent by default, i.e. the Real Servers will not see the source IP address of the client, they will see the load balancer’s own IP address by default, or any other local appliance IP address if preferred (e.g. the VIP address).
This can be configured per Layer 7 VIP. If required, the load balancer can be configured to provide the actual client IP address to the Real Servers in 2 ways. Either by inserting a header that contains the client’s source IP address, or by modifying the Source Address field of the IP packets and replacing the IP address of the load balancer with the IP address of the client. For more information on these methods please refer to Transparency at Layer 7.