


If the headline grabbed your attention and you're reading this, then you don't need me to tell you that Postman is an API platform used for building and using APIs, designed to make your life a whole lot easier!
Previously, we showed you how to use Postman to interact with the Loadbalancer API. So in this article, we'll take you through, step-by-step, how to use Postman to upload certificates directly to your Loadbalancer.org appliance.
Create a new Postman Project
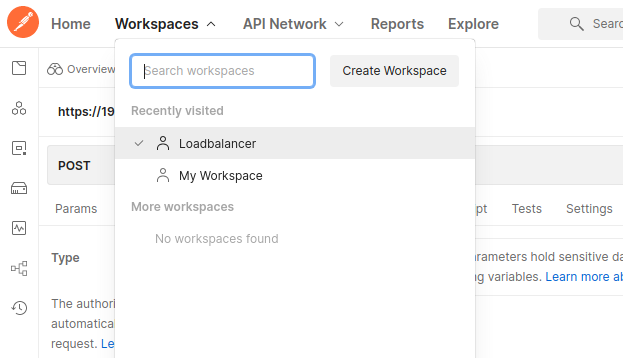
- Launch Postman and navigate to Workspaces. Then create a new workspace by clicking on Create Workspace:
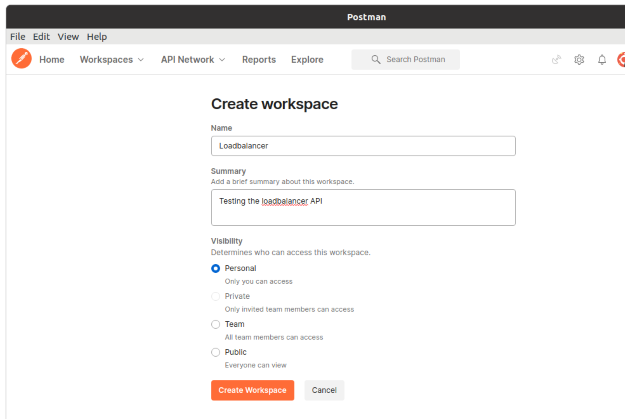
2. Give the new workspace a name (for example Loadbalancer) and click on Create Workspace to save it:
Form Action
3. Set the form action to POST with the URL of your load balancer appliance. For example:
https://192.168.85.99:9443/lbadmin/config/sslcert.php
Authorization
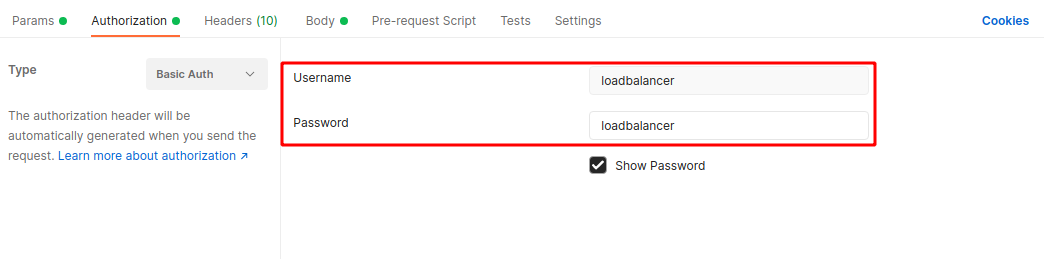
4. On the authorization tab, set the Type to Basic Auth and set the credentials to your load balancer username and password used to sign into the admin interface. In this example we are using:
| Username | Pasword |
|---|---|
| loadbalancer | loadbalancer |
Form Parameters
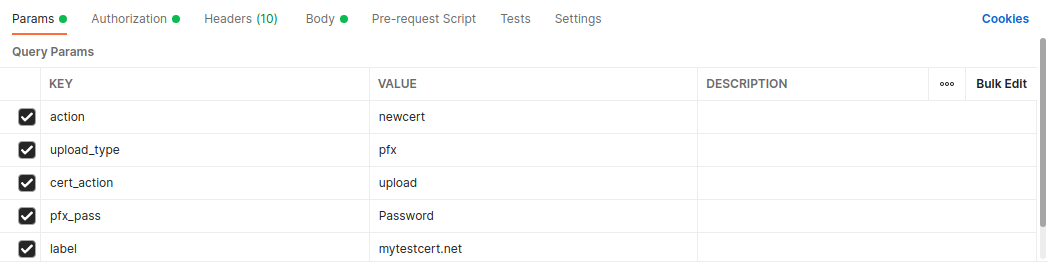
5. Now go to the Params tab and add the following keys with their corresponding values:
| Key | Value |
|---|---|
| action | newcert |
| cert_action | upload |
| upload_type | pfx |
| pfx_pass | Password |
| label | mytestcert.net |
NOTE: The pfx_pass should be the password that was given to the certificate when it was created. Also, it is worth noting that the label can anything you want, just something meaningful, that is specific to the nature of the certificate.
Declare the certificate filename
6. Now go to the Body tab and make sure the form-data option is checked and add the key, ssl_upload_file. After defining the key, there will be a down arrow when clicked, will present a drop-down menu listing: Text or file.
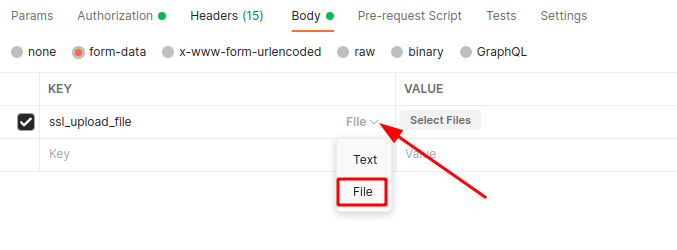
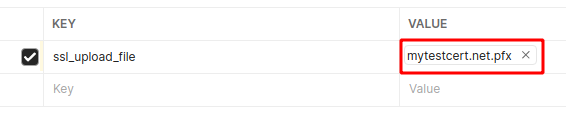
7. Set this to file and upload your pfx certificate from the file system, in this example the pfx file is called mytextcert.net.pfx. This will then add the cert file to the value column.
8. Then after all the prerequisites have been defined, click on send and the payload will be submitted to the Loadbalancer.
Upon a successful upload, the returned HTML will contain the string "SSL Certificate mytestcert.net uploaded".

NOTE: If you don't see this, then there is a good chance the upload failed or the certificate already exists.
Verify the certificate uploaded
9. Once the payload has been sent via Postman, go to the Loadbalancer Web UI, into Cluster Configuration, and select the menu option, SSL Certificate.

Here, you should now see the newly uploaded certificate, with the certificate name that was declared by the label key previously.
Check via SSH
10. To further verify the existence of the certificate, simply connect to the Loadbalancer appliance using SSH.
All certificates are stored in the folder:
/etc/loadbalancer.org/certs/
Below this folder will list the label name defined during the upload process as a subfolder, with the uploaded certificate listed.
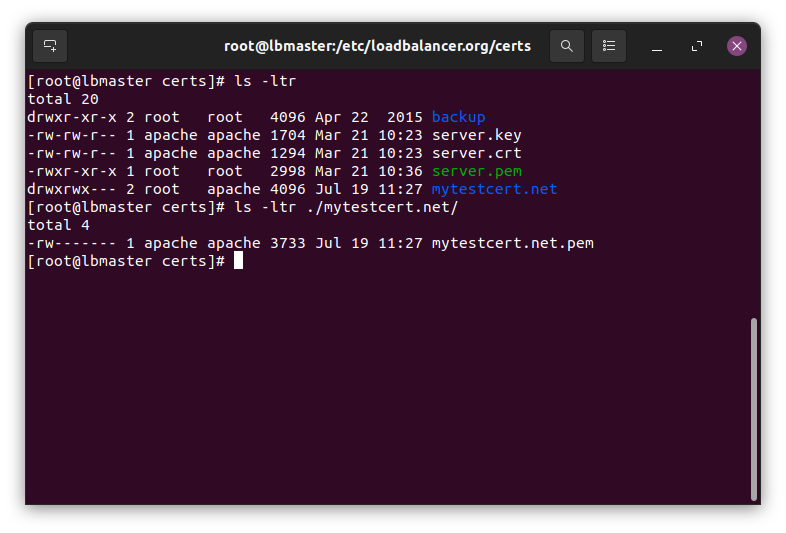
It's worth noting, that the uploaded certificate is converted to a PEM file.
So there you have it. Maybe not life-changing stuff - but, if you're like me, certainly life-enhancing : )


Cloudian takes object storage performance to the next level —with a tailored load balancer
Related posts
Finally, a simple way to convert MaxMind GeoIP Database files to the legacy DAT format!

Optimizing data storage: Using content-length headers to solve the 'small objects problem'
IPv6 and Loadbalancer.org: Finally making friends with those impossibly long addresses

Extending the ModSecurity WAF, with Denial Of Service protection — using HAProxy

HAProxy Enterprise Edition vs Progress Kemp LoadMaster: A no-fluff engineer comparison

Loadbalancer.org announces leadership transition and next phase of growth
ENVOY Proxy versus Loadbalancer.org: Why storage vendors need purpose-built load balancing for S3, NFS, and SMB

Architecting resilient object storage: Delivering multi-site capabilities for HPE with Loadbalancer.org GSLB