


Hypervisors such as Hyper-V and VMWare ESXi have the ability to import disk images within their graphical WebGUI. However, Proxmox unfortunately lacks this feature (see their bug 2424).
Due to this limitation, there is therefore a little bit of additional work needed to get a Virtual Machine (VM) up and running within PVE (though it’s not too difficult a task). Here's the workaround...
What is Proxmox?
Proxmox VE is a complete open-source platform for enterprise virtualization. You can simply manage VMs and containers, software-defined storage and networking, high-availability clustering, and several out-of-the-box utilities on a single solution using the built-in web interface.
In essence it’s a nice point and click web interface to running a hyperconverged platform, both commercial (paid for) and community (free to use) versions are available.
Prerequisites for Loadbalancer.org Proxmox deployment
Here are your prerequisites:
- Running PVE system (well beyond the scope of this document).
- SSH access to the PVE system.
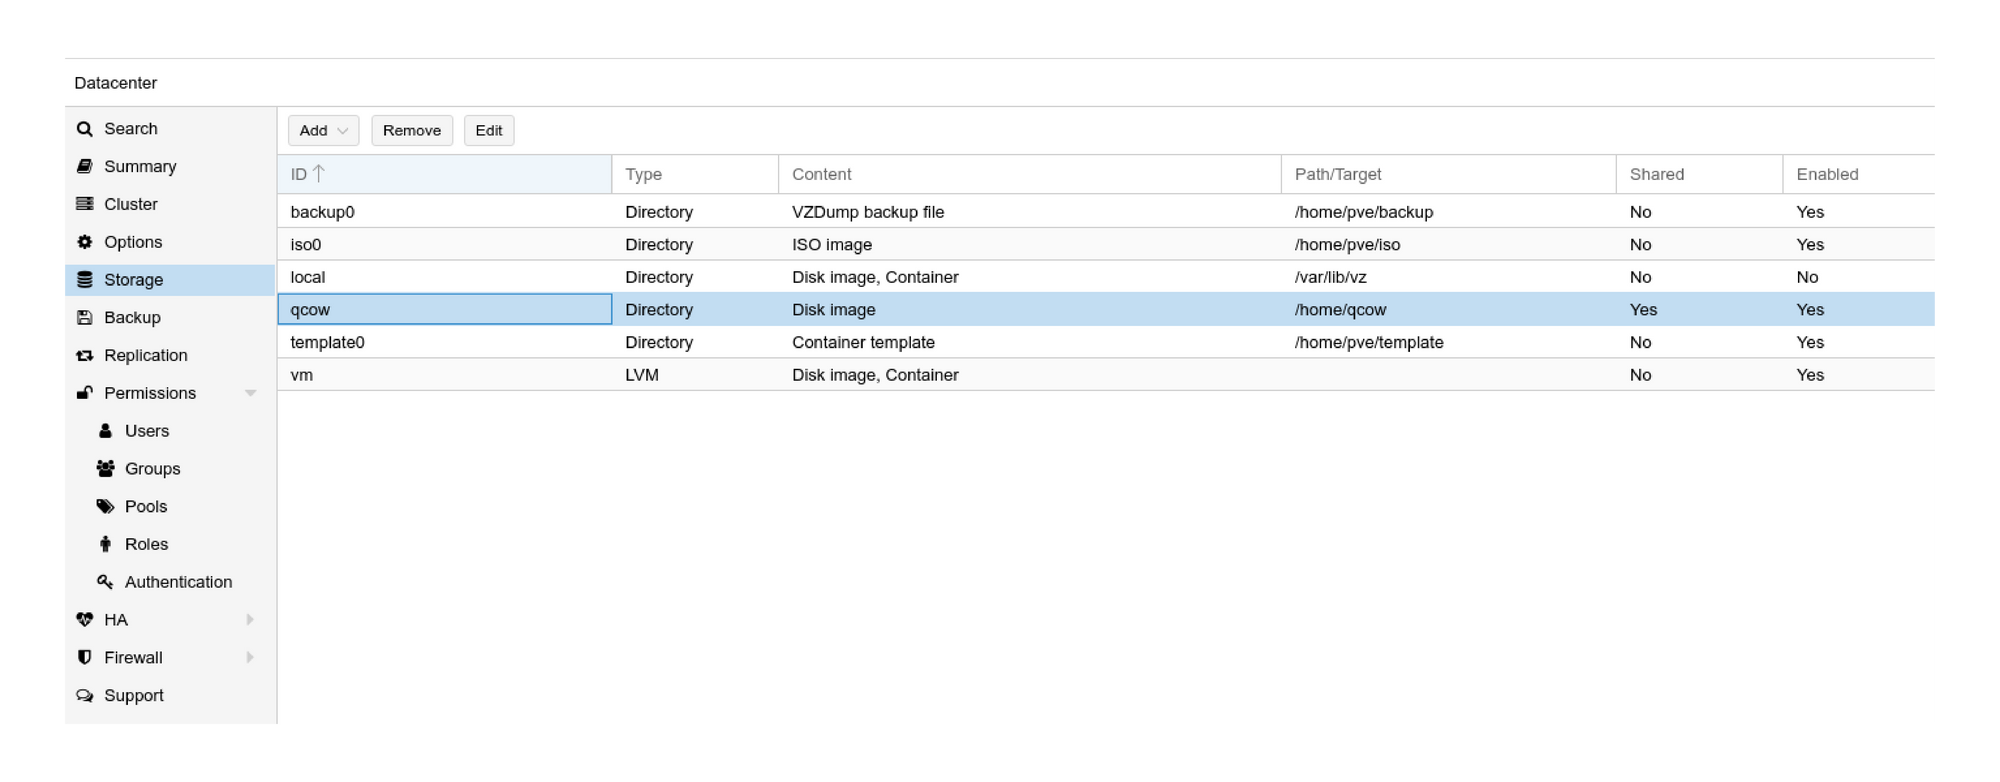
- A ‘Directory’ storage defined which will allow you to store disk images as a file (similar to the below):
How to deploy a Loadbalancer.org appliance on Proxmox
- Once you have the above items in place, start the VM creation by clicking this button (top right of My deployment):

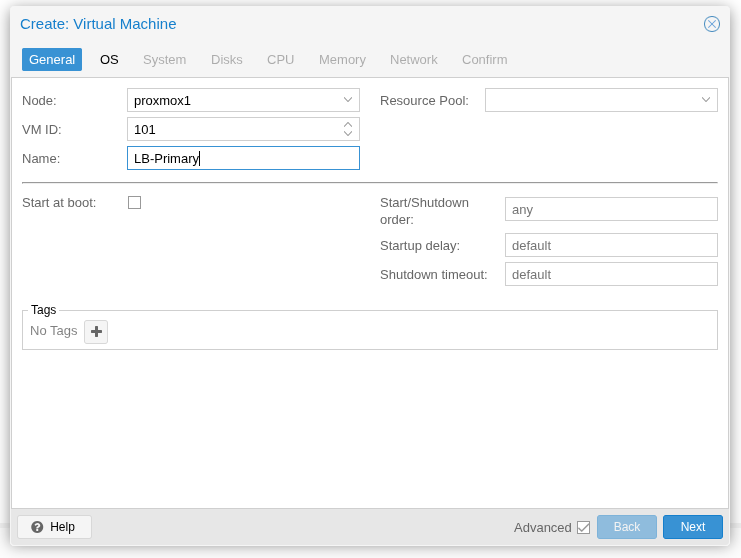
2. You then need to define a VM as per the following screens (note: proxmox1 is the hostname of my Proxmox system in use). I would urge you to use the Advanced options so you can enable settings like “Start at boot”.
Provide a Name that’s helpful (I have chosen “lb-Primary” for this explanation), and ideally set the appliance to Start at boot.
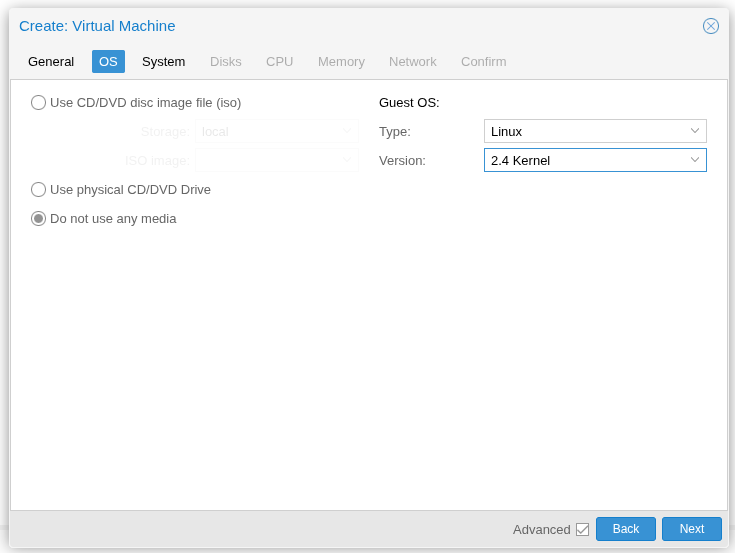
3. There’s no need to provide a CD/DVD image, so select "Do not use any media”, before proceeding:
4. Setting the Graphic card to VirtIO-GPU is not essential, but I have found a slight improvement in the graphical output when doing so. If you enable the Qemu Agent you’ll be able to access some stats from the VM within the PVE WebGUI, as well as be able to use buttons such as Shutdown and Reboot:

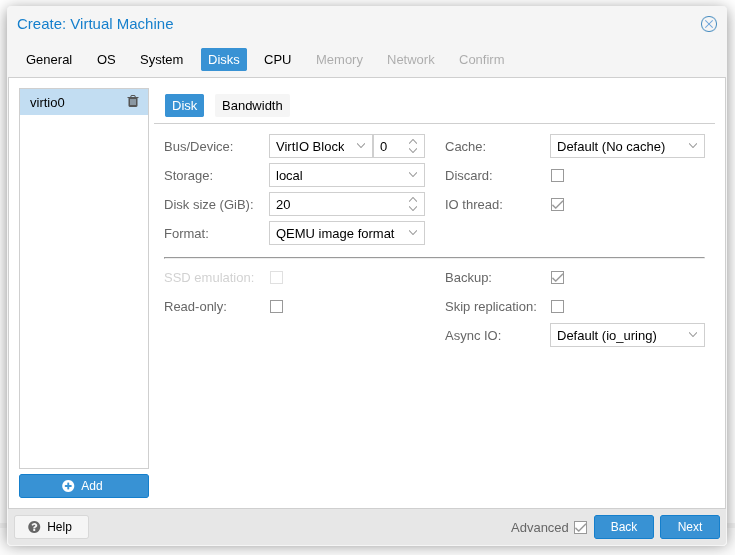
5. Setting the SCSI Controller to VirtIO SCSI is a requirement, otherwise the VM will not be able to access the hard disk image. Ensure you use the VirtIO Block bus, and choose the Storage that matches the prerequisite defined earlier (mine is named "local"). Set the disk size to 20GiB (we’ll replace this later):
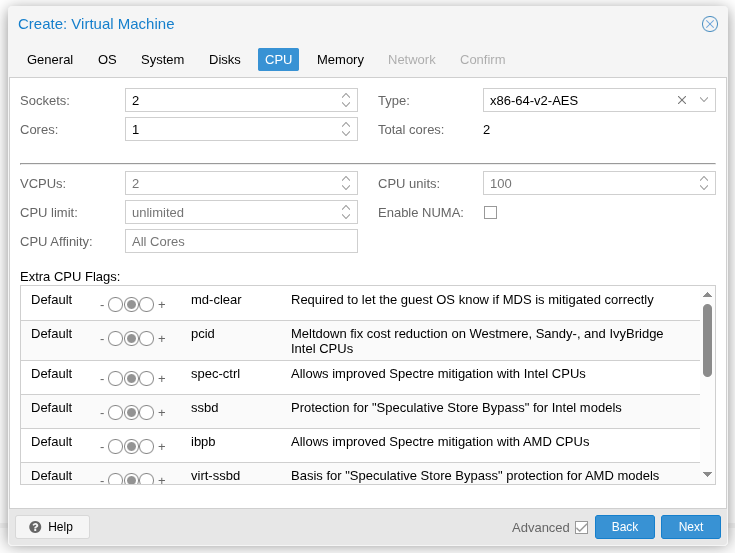
6. Allocate the required number of vCPUs (this can be adjusted later if needed). Our default configuration deploys with 2 vCPU cores:
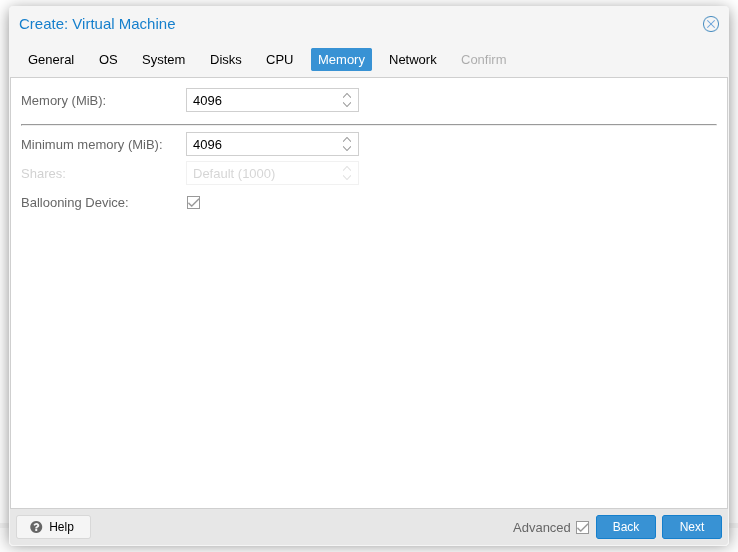
7. Allocate at least 4GiB (4096MiB) of RAM, which is our default and a minimum requirement, this can also be increased later if needed:
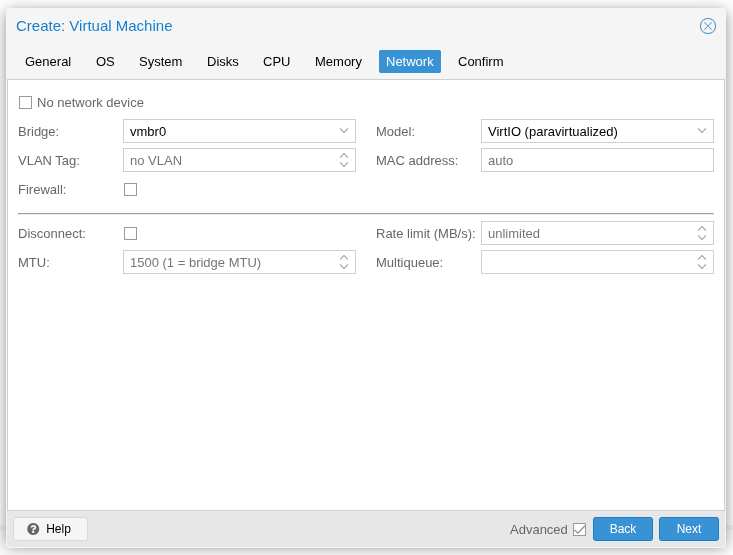
8. Ensure the VirtIO network card type is chosen, and that the appropriate bridge device is used (there may only be one):
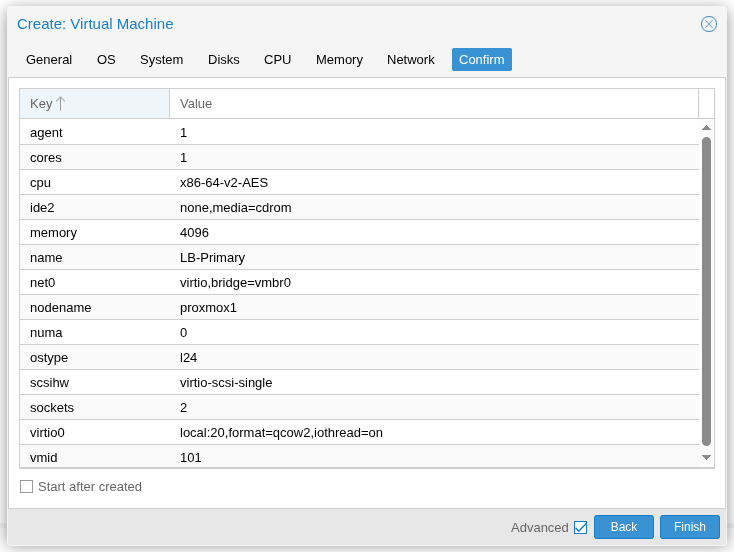
9. On this screen, ensure you have the Start after created unselected (DON'T START). When you click Finish the system will deploy a new VM, setup disks, network etc.:
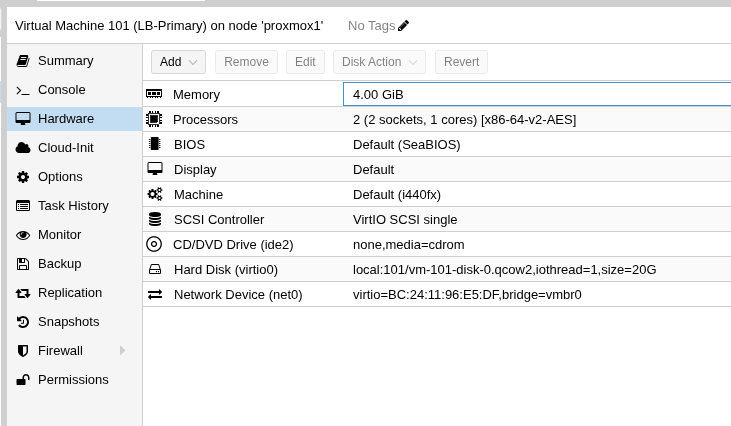
10. This is how the hardware screen for the VM looks following the deployment steps above:
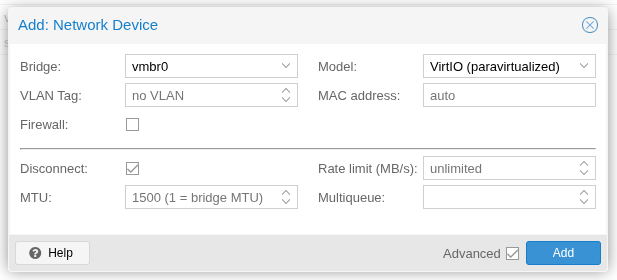
11. We now need additional network interfaces. I’ll add to a total of 4 (which is our default), ensuring they’re VirtIO and also set to Disconnect (we can connect these later as needed):
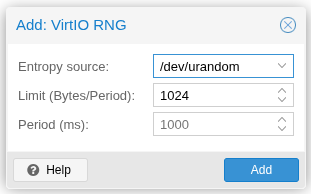
12. We also need to add a VirtIO RNG device (this helps with random number generation for SSL connections):
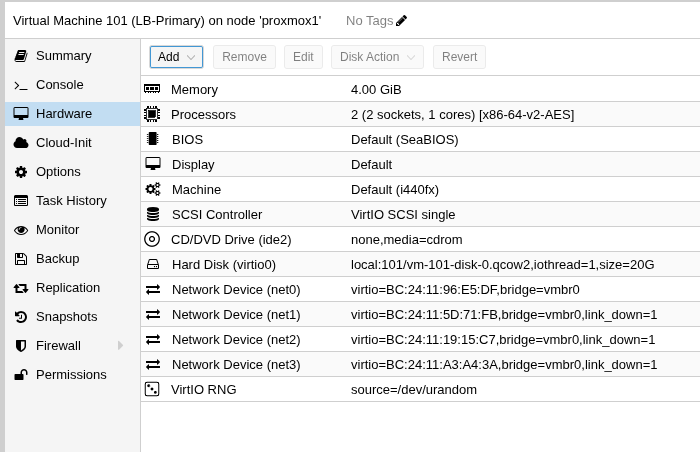
The hardware now looks like this, and we’re almost ready to go:
13. Next we need to head over to the CLI of the Proxmox system, and change to the directory of the image storage. Inside this is a directory called images where the disk images are held. Within this is a directory with the numeric ID of the defined VM (as per the screenshot in step 10. "Virtual Machine 101 'lb-Primary' on node"). Change into that directory.
14. Here I’ve downloaded the Loadbalancer.org KVM image archive. I then unpack the files, and copy the disk image directly over the top of the system generated disk image for the VM. Remember, it's important to do this BEFORE doing the first boot!
root@proxmox1:~# cd /var/lib/vz/images/101
root@proxmox1:/var/lib/vz/images/101# wget https://downloads.loadbalancer.org/releases/virtual/current/LBVMKVMv8.zip

--2025-05-29 11:08:45--  https://downloads.loadbalancer.org/releases/virtual/current/LBVMKVMv8.zip
Resolving downloads.loadbalancer.org (downloads.loadbalancer.org)... 99.86.91.116, 99.86.91.65, 99.86.91.18, ...
Connecting to downloads.loadbalancer.org (downloads.loadbalancer.org)|99.86.91.116|:443... connected.
HTTP request sent, awaiting response... 200 OK
Length: 728666011 (695M) [application/zip]
Saving to: ‘LBVMKVMv8.zip’

LBVMKVMv8.zip                                        100%[======================================================================================================================>] 694.91M  6.58MB/s    in 1m 50s

2025-05-29 11:10:35 (6.31 MB/s) - ‘LBVMKVMv8.zip’ saved [728666011/728666011]


root@proxmox1:/var/lib/vz/images/101# unzip LBVMKVMv8.zip
Archive:  LBVMKVMv8.zip
   creating: Load Balancer Enterprise ADC/
  inflating: Load Balancer Enterprise ADC/quickstartguideLBv8.13.pdf
  inflating: Load Balancer Enterprise ADC/quickstartguidePortal.pdf
  inflating: Load Balancer Enterprise ADC/Load-Balancer-Enterprise-ADC-v8.13.0.xml
  inflating: Load Balancer Enterprise ADC/ReadMe.txt
  inflating: Load Balancer Enterprise ADC/Load_Balancer_Enterprise_ADC-disk1.qcow2


root@proxmox1:/var/lib/vz/images/101# ls -lah
total 699M
drwxr----- 3 root root 4.0K May 29 11:11  .
drwxr-xr-x 4 root root 4.0K May 29 10:29  ..
-rw-r--r-- 1 root root 695M Mar 20 11:15  LBVMKVMv8.zip
-rw-r--r-- 1 root root   80 Mar 20 11:15  LBVMKVMv8.zip.sha256
drwxr-xr-x 2 root root 4.0K Mar  5 16:32 'Load Balancer Enterprise ADC'
-rw-r----- 1 root root  21G May 29 11:04  vm-101-disk-0.qcow2


root@proxmox1:/var/lib/vz/images/101# cp -v Load\ Balancer\ Enterprise\ ADC/Load_Balancer_Enterprise_ADC-disk1.qcow2 ./vm-101-disk-0.qcow2
'Load Balancer Enterprise ADC/Load_Balancer_Enterprise_ADC-disk1.qcow2' -> './vm-101-disk-0.qcow2'
15. At this point we’ve done all the prep work and are ready to go. I would suggest converting this machine to a template, or at least cloning it to save needing to jump through the above steps again!
16. Then all that’s needed is to start the resultant VM, open a console, run through setup then access the Loadbalancer.org WebGUI:

Let me know if you have any issues, or need any other workarounds, in the comments below!
Need help? Schedule a demo to see how to set it up.

Should a load balancer be your first line of defense against Denial of Service (DoS) attacks?


Three scenarios for implementing time-based security and content switching on your load balancer

Related posts
Finally, a simple way to convert MaxMind GeoIP Database files to the legacy DAT format!

Optimizing data storage: Using content-length headers to solve the 'small objects problem'
IPv6 and Loadbalancer.org: Finally making friends with those impossibly long addresses

Extending the ModSecurity WAF, with Denial Of Service protection — using HAProxy

HAProxy Enterprise Edition vs Progress Kemp LoadMaster: A no-fluff engineer comparison

Loadbalancer.org announces leadership transition and next phase of growth
ENVOY Proxy versus Loadbalancer.org: Why storage vendors need purpose-built load balancing for S3, NFS, and SMB

Architecting resilient object storage: Delivering multi-site capabilities for HPE with Loadbalancer.org GSLB