

This functionality is compatible with Enterprise version 8.9 and above. If you're thinking about giving mTLS a go, why not try it for yourself by following the steps below.
If you're not sure whether or not mTLS is right for you, and when to use it, you might want to read this blog first: Bolster your network with mTLS functionality from Loadbalancer.org.
What are your mTLS config options?
There are a number of different options to consider:
- mTLS can be enabled on the front-end (between the client and the load balancer)
- On the back-end (between the load balancer and the Real Servers)
- Combined in a chain
For full details check out our latest admin manual.
Here's how to enable them....
For front-end mTLS...
Step 1 - Configure the Layer 7 Virtual Service
- Using the WebUI, navigate to: Cluster Configuration > Layer 7 - Virtual Services and click Add a new Virtual Service.
- Enter the following details:
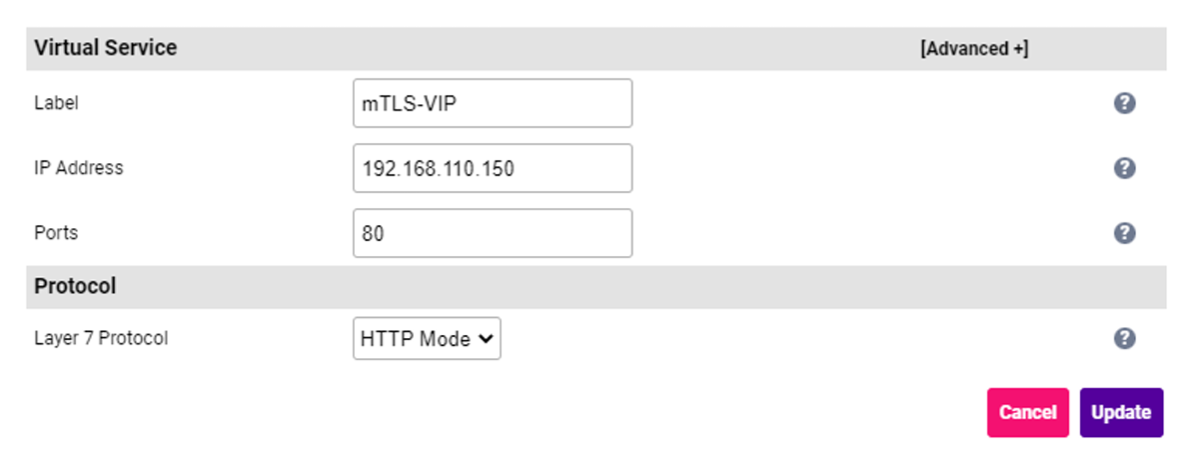
Specify an appropriate Label for the Virtual Service e.g. mTLS-VIP. Set the IP Address field to the required IP address e.g. 192.168.110.150. Leave the Ports field set to 80. Leave the Layer 7 Protocol set to HTTP Mode.
3. Click Update to create the Virtual Service.
Step 2 - Upload the CA Certificate
Note: This is the certificate that will be used to verify the identity of the client.
- Using the WebUI, navigate to: Cluster Configuration > CA Certificate Families.
- Click Create Family.
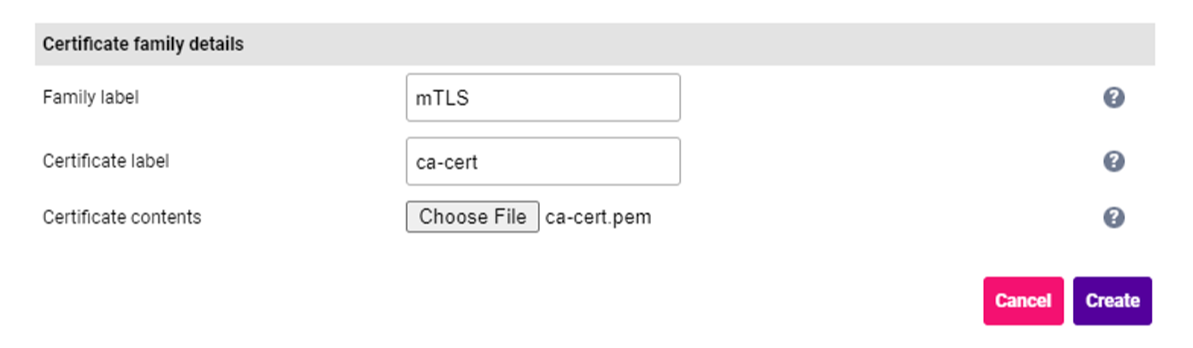
Specify a suitable Family label e.g. mTLS. Specify a suitable Certificate Label e.g. ca-cert. Click Choose File and browse to and select the relevant PEM or PFX file.
3. Click Create.
Step 3 - Create a HAProxy SSL Termination
- Using the WebUI, navigate to Cluster Configuration > SSL Termination and click Add a new Virtual Service.
- Enter the following details:
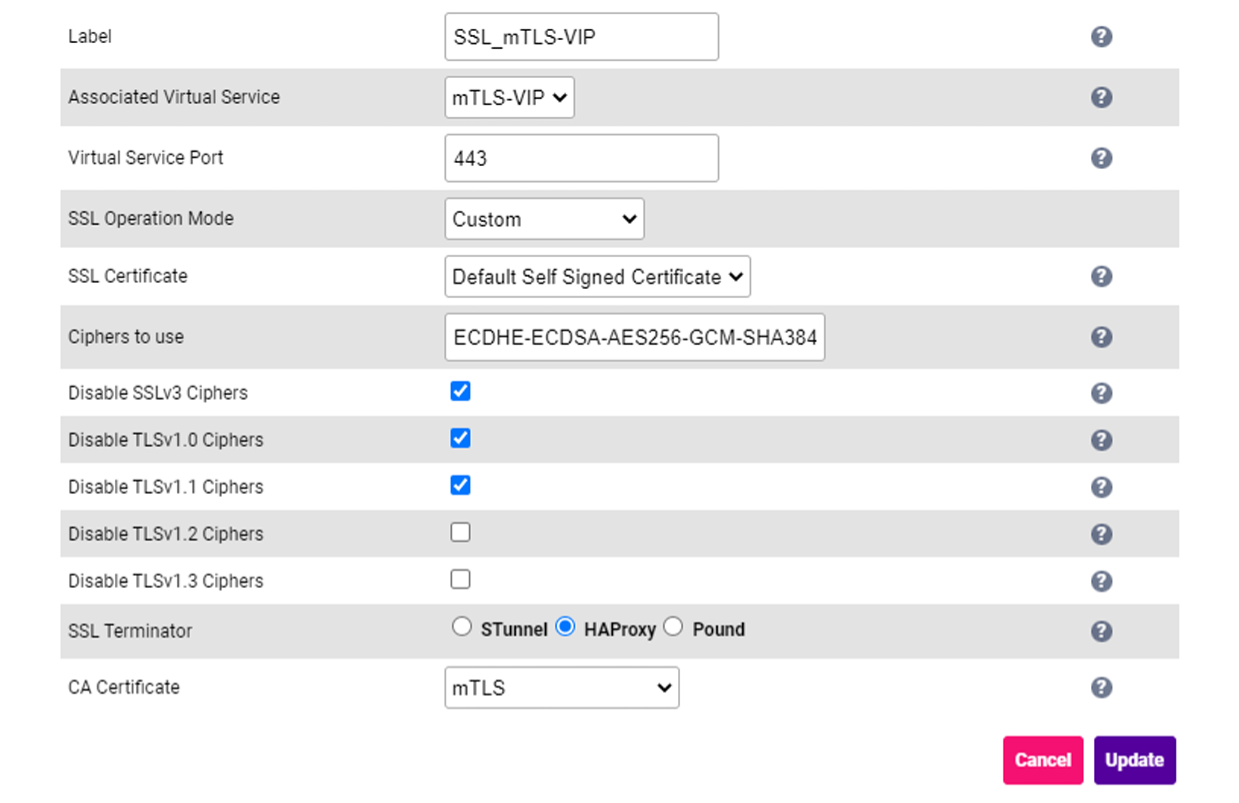
Set the Associated Virtual Service drop-down to the layer 7 VIP created previously e.g. mTLS-VIP. Change the SSL Operation Mode to Custom. Set the SSL Terminator to HAProxy. Set the CA Certificate to the CA Certificate Family created previously e.g. mTLS.
3. Click Update.
For back-end mTLS...
Step 1 - Upload the Back-End Certificate
Note: This is the certificate that will be sent to the backend server to prove the identity of the appliance.
- Using the WebUI, navigate to Cluster Configuration > SSL Certificate and click Add a new SSL Certificate.
- Select the option Upload prepared PEM/PFX file.
- Enter the following details:
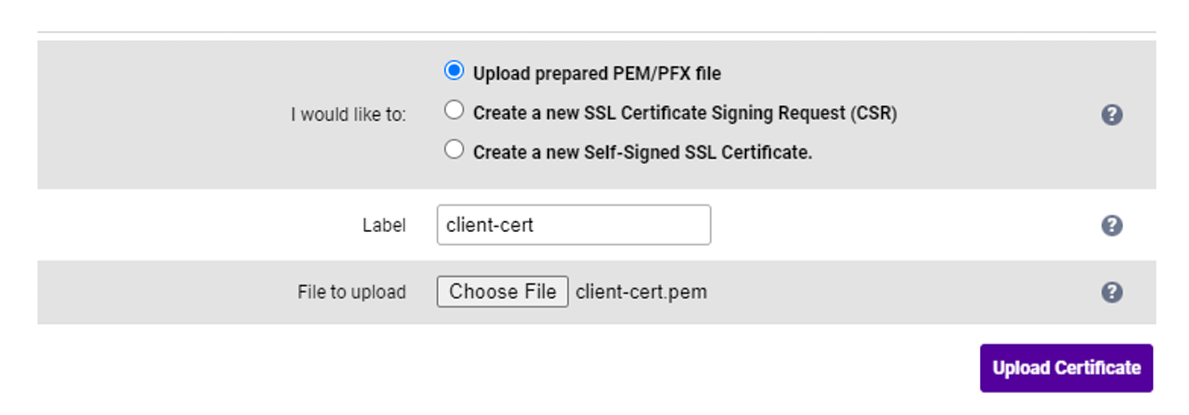
Specify an appropriate Label e.g. client-cert. Click Choose File and browse to and select the relevant PEM or PFX file. For PFX files specify the password if required.
4. Click Upload Certificate.
Step 2 - Configure the Real Servers
- Using the WebUI, navigate to: Cluster Configuration > Layer 7 - Real Servers and click. Add a new Real Server.
- Enter the following details:
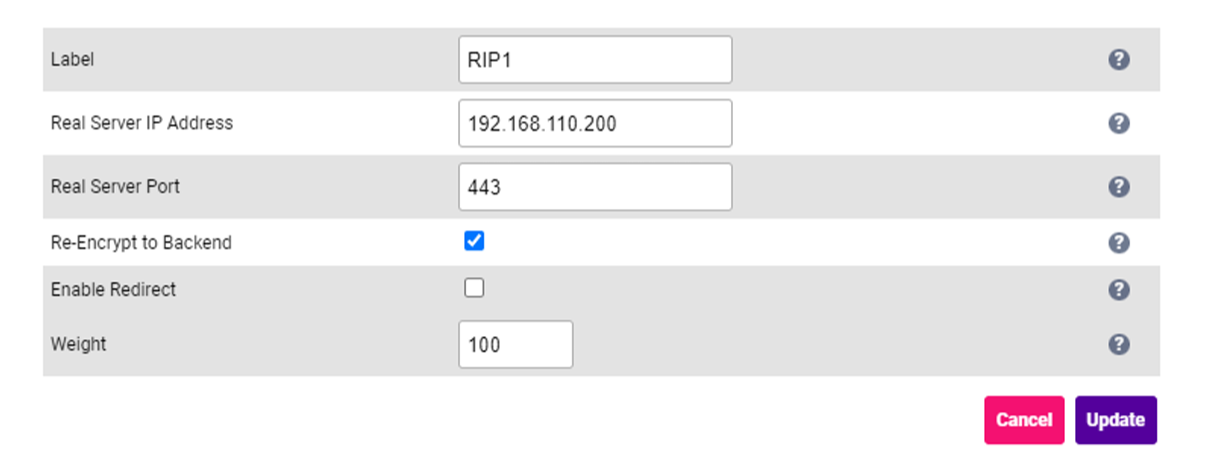
Specify an appropriate Label for the Real Server e.g. RIP1. Set the Real Server IP Address to the required IP address e.g. 192.168.110.200. Set the Real Server Port to 443. Enable Re-Encrypt to Backend.
3. Click Update.
4. Now click Modify next to the newly created Real Server.
5. Set the Verify Server Certificate drop-down to the certificate family that will be used to verify the identity of the Real Server, e.g. mTLS.
6. Set the Send Client Certificate drop-down to the certificate that will be sent to the Real Server to prove the identity of the appliance, e.g. client-cert.
7. Click Update.
If you get stuck, feel free to reach out to our Support team with any issues.
Conclusion
As always, make sure this config works for your use case. We're here to help so do reach out with any questions before you start if you're at all unsure.
If you don't already have one of our appliances and want to try it for yourself for FREE, just download and have a go!