


Note, this is an update of our earlier blog 'How to automate load balancer deployments' – if you've updated your load balancer to version 8.4.1 (or higher), read on for our up-to-date, recommended automation method.
Why should you be interested in automated deployments?
For our v8.4.1 release we added network, routing and HA functions to LBCLI, allowing you to completely automate the entire deployment from initial power-on to a fully configured HA pair. You need never touch the Loadbalancer.org appliance WUI again (just about) – with these enhancements come over 120 new JSON return messages and there are still features being added every week, waiting for each release target.
While adding these features we got a little carried away, and added more allowed values to the syntax checker – which now tells you where the mistake was made. Where possible it will make suggestions as to the correct key or value where the issue was observed.
I always limited the allowed input keys like --action or --layer . Mainly, this enhancement is not to allow anything other than what the equivalent WUI form would allow, less chance to intentionally or accidentally make bad JSON files or LBCLI input!
I will cover this at the end of the blog, because I'm sure you're much more interested in what is directly below!
With our v8.4.2 release we added Policy Based Routing(PBR) for VIPs to the WUI, and these features were added into LBCLI.
Now you can setup virtual service policy-based routing when required via LBCLI.
So why do I keep switching from LBCLI to api/v2 and then occasionally refer to /api? Well, all are linked to LBCLI. Both API Interfaces simply build and then call LBCLI and the mole working hard behind the scenes as a broker for the WUI executes the command and returns its output.
So the /api/v2 I mentioned...?
It's a new API wrapper for LBCLI which has a much simpler JSON layout which I will describe shortly. First let me assure you /api is still available and takes the old badly formed JSON input.
Now I would expect you to be asking why I am so negative about something I created? Well lets have a look at the two JSON formats together and the syntax involved to add a Layer 4 Virtual Service.
https://loadbalancer:9443/api/
{"auth":{
      "apikey":"eP68pvSMM8dvn051LL4d35569d438ue0"
   },
   "action":[
      {
         "command":"add-vip"
      }
   ],
   "syntax":[
      {
         "layer":"4",
         "vip":"theVipName",
         "ip":"192.168.100.123",
         "ports":"80",
         "forwarding":"gate",
         "protocol":"tcp"
      }
   ]
}So that is the old JSON format above and its post location, below is the new API interface and its post location
https://loadbalancer:9443/api/v2/
{"lbcli":[
      {
         "action":"add-vip",
         "vip":"theVipName",
         "layer":"4",
         "ip":"192.168.100.123",
         "ports":"80",
         "forwarding":"gate",
         "protocol":"tcp"
      }
   ]
}The simple LBCLI data format
If you wish to know how each command is formed then "lbcli --help lbcli" is the starting place.
lbcli --action add-vip \
      --vip theVipName \
      --layer 4 \
      --ip 192.168.100.123 \
      --ports 80 \
      --forwarding gate \
--protocol tcpBecause without this neither JSON examples will make any sense or show how the format conversion works, with one limitation.
And that limitation is simply that the "action" must be the first --action in each API call or for any LBCLI command.
Now how much simpler is that to work with then?
Each API Call is now an "lbcli --action" command with it's syntax and is complete in one block and what is better you can use all edit-vip or edit-waf edit features when adding each Virtual Service, simply add the extra key values to the action array.
Now remember you can use either JSON format but I am sure you will much prefer the use of the /api/v2/ post interface!
You will see that the JSON data is missing the auth->apikey and the syntax has been merged with the action, this eased the portability of each snippet creating that all wonderful word "template" more about those soon to follow.
So how do you access /api/v2?
Below you will find bash(curl), php(curl), Python3(urllib) and Powershell (Windows) examples and we have seen seen customers using C# to connect to LBCLI via HTTP/s
Remember none of the scripts below get run on the Loadbalancer.org appliance, if they did they would be a little pointless. Neither can you execute LBCLI from an Execute a Shell Command as that would be quite pointless. Remember, LBCLI interfaces with the WUI and at this point you are using the WUI so why allow the abstraction there?
| Please note: you may need to use X-LB-APIKEY instead of X_LB_APIKEY for some languages/client libraries, including C#. This also applies for any version starting with v8.6 and above of our appliance. |
|---|
#!/bin/bash
# loadbalancer.org api/v2 curl apicall
# Created by Andruw Smalley
# really simple curl command build from the input, no real validation.
while true; do
  case "$1" in
    -l | --loadbalancer ) loadbalancer="$2"; shift 2 ;;
    -u | --username ) username="$2"; shift 2 ;;
    -p | --password ) password="$2"; shift 2 ;;
    -j | --json ) json="$2"; shift 2 ;;
    -a | --apikey ) apikey==$(echo $2 | base64); shift 2 ;;
    * ) break ;;
  esac
done
if [ $loadbalancer != "" ] || [ $username != "" ] || [ $password != "" ] || [ $json != "" ] || [ $apikey != "" ]; then
	curl -u ${username}:${password} -X POST  \
	     --header "X_LB_APIKEY: ${apikey}" \
	     --header Content-Type:application/json \
	     -d @${json} https://${loadbalancer}:9443/api/v2/ -k
else
	echo "./apicall.sh --loadbalancer 192.168.2.21 --username loadbalancer --password loadbalancer --json /path/to/json.json --apikey eP68pvSMM8dvn051LL4d35569d438ue0"
fi<?php
// lbcli php curl api/v2 interface
// loadbalancer.org (c) 2019 - by Andruw Smalley.
// the api/v2 php function interface example.
function curlApiCallv2 ( $apidata ) {
$endpoint="https://".$apidata['address'].":".$apidata['port']."/api/v2/";
$ch = curl_init();
curl_setopt($ch, CURLOPT_URL, $endpoint);
curl_setopt($ch, CURLOPT_TCP_NODELAY,1);
curl_setopt($ch, CURLOPT_SSL_VERIFYHOST, 0);
curl_setopt($ch, CURLOPT_SSL_VERIFYPEER, 0);
curl_setopt($ch, CURLOPT_RETURNTRANSFER, 1);
curl_setopt($ch, CURLOPT_FOLLOWLOCATION, 0);
curl_setopt($ch,CURLOPT_ENCODING , "");
curl_setopt($ch, CURLOPT_HTTPHEADER, array('X_LB_APIKEY:'.base64_encode($apidata['apikey']),
'Accept-Encoding: gzip, deflate','Connection: Close'));
curl_setopt($ch, CURLOPT_HTTPAUTH, CURLAUTH_ANY);
curl_setopt($ch, CURLOPT_USERPWD, $apidata['username'].":".$apidata['password']);
curl_setopt($ch, CURLOPT_POST, 1);
curl_setopt($ch, CURLOPT_POSTFIELDS, $apidata['json'] );
$result = curl_exec ($ch);
$ttime = curl_getinfo($ch, CURLINFO_TOTAL_TIME);
//get status code
curl_close ($ch);
$result=str_replace("[]","\"\"",$result);
// clean empty arrays from the result.
$result=json_decode($result,true);
if(is_array($result) && isset($result['lbapi'])) {
return $result['lbapi'][0]['itteration'][0];
// we dont want all the itteration stuff yet,
// for now we only need one itteration as we dont run multiple lbcli itterations yet!
} else {
return $result;
}
}Now that we have the function above, we can call it using the example below.
<?php
require_once("curlApiCallInterface.php");
// How to call the function

$apidata['address'] = "192.168.100.100";
$apidata['port'] = "9443";
$apidata['apikey'] = "eP68pvSMM8dvn051LL4d35569d438ue0";
$apidata['username'] = "apiuser"
$apidata['password']= "apipassword";

$apidata['json'] = "{"lbcli":[{\"action\":\"add-vip\",\"vip\":\"vipname\",\"... more options .....\"}]}";
$results =  curlApiCallv2 ( $apidata );

print_r($results); #!/usr/bin/env python3
from io import TextIOWrapper
from sys import stdin
from ssl import SSLContext
from json import load
from base64 import b64encode
from getpass import getpass
from argparse import ArgumentParser, FileType
from ipaddress import ip_address, IPv6Address
from urllib.parse import urlunparse
from urllib.request import urlopen, Request, HTTPPasswordMgrWithPriorAuth, HTTPBasicAuthHandler, HTTPSHandler, build_opener
# Parse command line arguments
parser = ArgumentParser (
description = 'Send JSON to the Loadbalancer.org v2 API.')
parser.add_argument (
'address',
type = ip_address,
help = 'ip address')
parser.add_argument (
'apikey',
type = str,
help = 'shared secret')
parser.add_argument (
'username',
type = str,
help = 'username')
parser.add_argument (
'password',
type = str,
nargs = '?',
help = 'password, prompts interactively if unspecified')
parser.add_argument (
'--json',
type = FileType ('r'),
default = stdin,
help = 'file to send, stdin if not specified.')
parser.add_argument (
'--port',
type = int,
default = 9443,
help = 'port, defaults to 9443')
args = parser.parse_args ()
# Setup the Request
password = args.password
if password is None:
password = getpass ('Password: ')
address = str (args.address)
if type (args.address) is IPv6Address:
address = '[' + address + ']'
url = 'https://{host}:{port}/api/v2/'.format (
host = address,
port = args.port)
request = Request (
url = url,
method = 'POST',
data = args.json.read ().encode ('utf-8'),
headers = {
'X-LB-APIKEY': b64encode (args.apikey.encode ('utf-8'))
})
# Create an OpenerDirector that will ignore Certificate errors and
# will _always_ send our username and password with a request.
password_manager = HTTPPasswordMgrWithPriorAuth ()
password_manager.add_password (None, url, args.username, password)
opener = build_opener (
HTTPBasicAuthHandler (password_manager),
HTTPSHandler (context = SSLContext ()))
# POST the request and do something with the response
with opener.open (request) as response:
if response.status != 200:
exit (response.status)
result = load (TextIOWrapper (response, 'utf-8'))
print (result)
print (result['lbapi'][0]['itteration'][0])
exit (0);
Param(  $loadbalancer, $json, $username, $password,  $apikey )
echo "Connecting to ${loadbalancer}"
$pair = "$username:$password"
$bytes = [System.Text.Encoding]::ASCII.GetBytes($pair)
$base64 = [System.Convert]::ToBase64String($bytes)
$basicAuth = "Basic $base64"
$apikeybytes = [System.Text.Encoding]::ASCII.GetBytes($apikey)
$apikey = [System.Convert]::ToBase64String($apikeybytes)
$jsonfile = Get-Content $json  -Raw
$headers = @{}
$headers.Add( "Authorization", $basicAuth )
$headers.Add( "X_LB_APIKEY", $apikey )
$uri="https://${ip}:9443/api/v2/"
[Net.ServicePointManager]::SecurityProtocol = [Net.SecurityProtocolType]::Tls12
[System.Net.ServicePointManager]::CertificatePolicy = New-Object TrustAllCertsPolicy
$response = Invoke-WebRequest -Uri $uri -Method:Post -Body $jsonfile -ContentType "application/json" -Headers $headers{"lbcli":[
{
"action":"hostname",
"function":"set",
"hostname":"lbapirocks",
"domain":"lb.zerodns.co.uk"
}
]
}
So we now know how to connect to /api/v2 on any version greater than v8.4.1 but what about the returned data? Well I will get to that very shortly however first one must enable the API and the Loadbalancer.org appliance since v8.3.8 has been Secure by default so we need something to change the security settings.
Below is a script for changing the Secure by default mode.
#!/bin/bash
# loadbalancer.org api/v2 curl apicall
# Created by Andruw Smalley
# really simple curl command build from the input, no real validation.
#
# ./securebydefault.sh --loadbalancer 192.168.2.21 \
# --username loadbalancer --password loadbalancer \
# --mode custom --ssh off --httpsonly off --cert server
# Populate defaults so if you do
# not the setting will not be lost
username="loadbalancer"
password="loadbalancer"
loadbalancer="192.168.2.21"
wuiport=9443
mode="secure" # change to custom
ssh="off" # on for ssh aceess
cert="server"
httpsonly="on"
ciphers="ECDHE-RSA-AES128-SHA:DHE-RSA-AES256-SHA:AES256-SHA:HIGH:!MD5:!aNULL:!EDH"
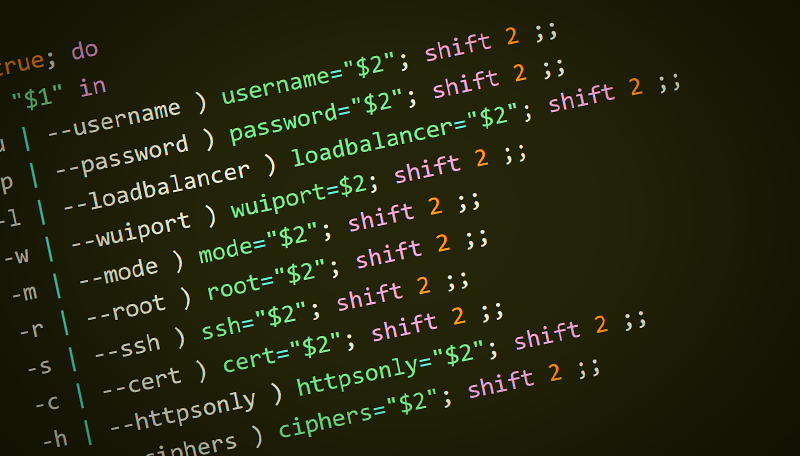
while true; do
case "$1" in
-u | --username ) username="$2"; shift 2 ;;
-p | --password ) password="$2"; shift 2 ;;
-l | --loadbalancer ) loadbalancer="$2"; shift 2 ;;
-w | --wuiport ) wuiport=$2; shift 2 ;;
-m | --mode ) mode="$2"; shift 2 ;;
-r | --root ) root="$2"; shift 2 ;;
-s | --ssh ) ssh="$2"; shift 2 ;;
-c | --cert ) cert="$2"; shift 2 ;;
-h | --httpsonly ) httpsonly="$2"; shift 2 ;;
-i | --ciphers ) ciphers="$2"; shift 2 ;;
* ) break ;;
esac
done
curl -u ${username}:${password} -X POST \
--form applianceSecurityMode=${mode} \
--form disableRootAccess=${root} \
--form disableSSHPass=${ssh} \
--form wui_https_only=${httpsonly} \
--form wui_https_port=${wuiport} \
--form wui_https_cert=${cert} \
--form wui_https_ciphers=${ciphers} \
--form go=Update \
--insecure -k "https://${loadbalancer}:${wuiport}/lbadmin/config/secure.php?action=edit" -o >/dev/null
WARNING TIME, and something required before we proceed.
So before the deployment can begin we must first make one requirement before we can proceed.
The workstation from where you will be doing your deployment must have an ip address in 192.168.2.0/24 subnet and not 192.168.2.21 as each default Loadbalancer.org appliance will have this in use.
This will enable the initial configuration of a default Loadbalancer.org appliance.
Below is an example to put your workstation in the same subnet, in my case the Loadbalancer.org appliances are connected to "virbr0"
sudo ip ad ad 192.168.2.1/24 dev virbr0Or you must run setup on the console to first make an IP Address accessible to you, The choice is yours!
Now let us turn secure by default off on the first Loadbalancer.org appliance.
./securebydefault.sh --loadbalancer 192.168.2.21 --username loadbalancer --password loadbalancer --ssh off --root off --mode custom[asmalley@homer lb_apicall_blog]$ ./securebydefault.sh --loadbalancer 192.168.2.21 --username loadbalancer \
--password loadbalancer --ssh off --root off --mode custom
% Total % Received % Xferd Average Speed Time Time Time Current
Dload Upload Total Spent Left Speed
100 20045 0 19074 100 971 23606 1201 --:--:-- --:--:-- --:--:-- 24777
So we have now turned the secure by default off and now we can do an SSH lbcli call to the first Loadbalancer.org appliance and get the APIKEY to be used in the API call as $apikey_master variable
export apikey_master=$(sshpass -p loadbalancer ssh -o StrictHostKeyChecking=no root@192.168.2.21 \
lbcli --action api --password loadbalancer --function enable | tail -1 | cut -d'=' -f2)As soon as we have the APIKEY we are able to put the first appliance back into its secure by default mode but first let us check to ensure we have populated $apikey_master
[asmalley@homer lb_apicall_blog]$ echo $apikey_master
4we7jatm6FbfK2ku8AE9NLrGcQzBpPdW
So we have an APIKEY and we can now turn secure by default back on
./securebydefault.sh --loadbalancer 192.168.2.21 \
--username loadbalancer --password loadbalancer --ssh on --root on --mode secureNow we are able to go ahead and deploy a highly available pair of Loadbalancer.org appliances from scratch:
{"lbcli":[
      {
         "action":"hostname",
         "function":"set",
         "hostname":"mole",
         "domain":"master.lb.zerodns.co.uk"
      },
      {
         "action":"dns",
         "function":"set",
         "dns0":"8.8.8.8",
         "dns1":"1.1.1.1"
      },
      {
         "action":"address",
         "function":"flush",
         "interface":"eth0"
      },
      {
         "action":"address",
         "function":"add",
         "address":"172.31.200.2/24",
         "interface":"eth0"
      },
      {
         "action":"route",
         "function":"default",
         "type":"set",
         "gateway":"172.31.200.1"
      },
      {
         "action":"route",
         "function":"static",
         "type":"add",
         "network":"192.168.100.0/18",
         "gateway":"172.31.200.1"
      },
      {
         "action":"power",
         "function":"restart"
      }
   ]
}To have the API add this setup to your first Master Loadbalancer.org appliance
./apicall.sh --loadbalancer 192.168.2.21 --username loadbalancer \
--password loadbalancer --json master.json --apikey $apikey_masterResults:
{"lbapi":[
      {"itteration":[
            {"lbcli":[
                  {
                     "action":"hostname",
                     "function":"set",
                     "hostname":"mole",
                     "domain":"master.lb.zerodns.co.uk",
                     "status":"success"
                  }
               ]
            }
         ]
      },
      {"itteration":[
            {"lbcli":[
                  {
                     "action":"dns",
                     "function":"set",
                     "status":"success",
                     "servers":{
                        "dns0":"8.8.8.8",
                        "dns1":"1.1.1.1",
                        "dns2":""
                     }
                  }
               ]
            }
         ]
      },
      {"itteration":[
            {"lbcli":[
                  {
                     "action":"address",
                     "function":"flush",
                     "interface":"eth0",
                     "address":""
                  }
               ]
            }
         ]
      },
      {"itteration":[
            {"lbcli":[
                  {
                     "action":"address",
                     "function":"add",
                     "interface":"eth0",
                     "address":"172.31.200.2/24"
                  }
               ]
            }
         ]
      },
      {"itteration":[
            {"lbcli":[
                  {
                     "action":"gateway",
                     "function":"set",
                     "status":"success",
                     "default":{
                        "ip_version":"ipv4",
                        "gateway":"172.31.200.1",
                        "interface":"auto"
                     }
                  }
               ]
            }
         ]
      },
      {"itteration":[
            {"lbcli":[
                  {
                     "action":"route",
                     "function":"static",
                     "type":"add",
                     "route":[
                        {
                           "network":"192.168.100.0/18",
                           "gateway":"172.31.200.1"
                        }
                     ],
                     "status":"success"
                  }
               ]
            }
         ]
      },
      {"itteration":[
            {"lbcli":[
                  {
                     "action":"power",
                     "function":"restart",
                     "status":"restarting"
                  }
               ]
            }
         ]
      }
   ]
}Now let us setup what will become the Slave:
First we need to change the secure by default mode on the second appliance and then get its APIKEY and store it in $apikey_slave
./securebydefault.sh --loadbalancer 192.168.2.21 --username loadbalancer --password loadbalancer --ssh off --root off --mode customNow we can SSH to the Loadbalancer.org appliance in its default state we can go ahead and get its APIKEY
export apikey_slave=$(sshpass -p loadbalancer ssh -o StrictHostKeyChecking=no root@192.168.2.21 \
lbcli --action api --password loadbalancer --function enable | tail -1 | cut -d'=' -f2)Let us see if we $apikey_slave has been populated.
[asmalley@homer lb_apicall_blog]$ echo $apikey_slave
BxuzDfyKov7SdrUij90lIeMhXwLbYqgV
Once we have obtained our APIKEY we will not longer need to access SSH, this was a one off operation to enable the API and set credentials so we will put the Loadbalancer.org appliance back to its secure by default mode below
./securebydefault.sh --loadbalancer 192.168.2.21 --username loadbalancer --password loadbalancer --ssh on --root on --mode secureNow we are able to complete the initial setup of the second Loadbalancer.org appliance using the JSON file below
{"lbcli":[
      {
         "action":"hostname",
         "function":"set",
         "hostname":"mole",
         "domain":"slave.lb.zerodns.co.uk"
      },
      {
         "action":"dns",
         "function":"set",
         "dns0":"8.8.8.8",
         "dns1":"1.1.1.1"
      },
      {
         "action":"address",
         "function":"flush",
         "interface":"eth0"
      },
      {
         "action":"address",
         "function":"add",
         "address":"172.31.200.3/24",
         "interface":"eth0"
      },
      {
         "action":"route",
         "function":"default",
         "type":"set",
         "gateway":"172.31.200.1"
      },
      {
         "action":"route",
         "function":"static",
         "type":"add",
         "network":"192.168.100.0/18",
         "gateway":"172.31.200.1"
      },
      {
         "action":"power",
         "function":"restart"
      }
   ]
}This can now be added to the second Loadbalancer.org appliance with the command below:
./apicall.sh --loadbalancer 192.168.2.21 --username loadbalancer --password loadbalancer --json slave.json --apikey $apikey_slaveOnce complete you will have 2 Master appliances now and have received a JSON response as below:
{"lbapi":[
      {"itteration":[
            {"lbcli":[
                  {
                     "action":"hostname",
                     "function":"set",
                     "hostname":"mole",
                     "domain":"slave.lb.zerodns.co.uk",
                     "status":"success"
                  }
               ]
            }
         ]
      },
      {"itteration":[
            {"lbcli":[
                  {
                     "action":"dns",
                     "function":"set",
                     "status":"success",
                     "servers":{
                        "dns0":"8.8.8.8",
                        "dns1":"1.1.1.1",
                        "dns2":""
                     }
                  }
               ]
            }
         ]
      },
      {"itteration":[
            {"lbcli":[
                  {
                     "action":"address",
                     "function":"flush",
                     "interface":"eth0",
                     "address":""
                  }
               ]
            }
         ]
      },
      {"itteration":[
            {"lbcli":[
                  {
                     "action":"address",
                     "function":"add",
                     "interface":"eth0",
                     "address":"172.31.200.3/24"
                  }
               ]
            }
         ]
      },
      {"itteration":[
            {"lbcli":[
                  {
                     "action":"gateway",
                     "function":"set",
                     "status":"success",
                     "default":{
                        "ip_version":"ipv4",
                        "gateway":"172.31.200.1",
                        "interface":"auto"
                     }
                  }
               ]
            }
         ]
      },
      {"itteration":[
            {"lbcli":[
                  {
                     "action":"route",
                     "function":"static",
                     "type":"add",
                     "route":[
                        {
                           "network":"192.168.100.0/18",
                           "gateway":"172.31.200.1"
                        }
                     ],
                     "status":"success"
                  }
               ]
            }
         ]
      },
      {"itteration":[
            {"lbcli":[
                  {
                     "action":"power",
                     "function":"restart",
                     "status":"restarting"
                  }
               ]
            }
         ]
      }
   ]
}Next is the process of creating HA on the Master and then we will go on to add some virtual services.
Notice the use of the 172.31.200.2,3 IP Addresses now and how the APICALL is no longer talking to the 192.168.2.21 addresses, this is because we have done the initial network setup of each Loadbalancer.org appliances and we no longer to have 192.168.2.1 on our deployment workstation
So lets remove the IP Address we added earlier, we do not need that subnet any more
sudo ip ad del 192.168.2.1/24 dev virbr0{"lbcli":[
{
"action":"ha_create",
"local_ip":"172.31.200.2",
"peer_ip":"172.31.200.3",
"peer_password":"loadbalancer"
}
]
}You would add the JSON above as seen below using the php example:
./apicall.sh --loadbalancer 172.31.200.2 --username loadbalancer --password loadbalancer --json ha_create.json --apikey $apikey_masterThe response from the apicall after creating a HA Pair:
Please note that creating a HA Pair does take a little while so do expect to wait upto 30 seconds for the response below:
{"lbapi":[
      {"itteration":[
            {"lbcli":[
                  {
                     "action":"ha_create",
                     "status":"success"
                  }
               ]
            }
         ]
      }
   ]
}Now that we have done the initial configuration to the pair of Loadbalancer.org appliances we can continue and create some Virtual Services and add the Real Servers to each Virtual Service.
{"lbcli":[
      {
         "action":"add-vip",
         "layer":"7",
         "vip":"webserver",
         "ip":"172.31.200.22",
         "ports":"80",
         "mode":"tcp"
      },
      {
         "action":"add-rip",
         "vip":"webserver",
         "rip":"webserver0",
         "ip":"172.31.200.0",
         "weight":"100"
      },
      {
         "action":"add-rip",
         "vip":"webserver",
         "rip":"webserver1",
         "ip":"172.31.0.11",
         "weight":"100"
      },
      {
         "action":"add-rip",
         "vip":"webserver",
         "rip":"ws2",
         "ip":"172.31.0.12",
         "weight":"100"
      },
      {
         "action":"add-vip",
         "layer":"7",
         "vip":"owa",
         "ip":"172.31.200.120",
         "ports":"443",
         "mode":"tcp"
      },
      {
         "action":"add-rip",
         "vip":"owa",
         "rip":"owa0",
         "ip":"172.31.0.100",
         "weight":"100"
      },
      {
         "action":"add-rip",
         "vip":"owa",
         "rip":"owa1",
         "ip":"172.31.0.110",
         "weight":"100"
      },
      {
         "action":"add-rip",
         "vip":"owa",
         "rip":"owa2",
         "ip":"172.31.0.120",
         "weight":"100"
      },
      {
         "action":"add-vip",
         "layer":"7",
         "vip":"exchange_smtp",
         "ip":"172.31.200.21",
         "ports":"25",
         "mode":"tcp"
      },
      {
         "action":"add-rip",
         "vip":"exchange_smtp",
         "rip":"exchange0",
         "ip":"172.31.0.100",
         "weight":"100"
      },
      {
         "action":"add-rip",
         "vip":"exchange_smtp",
         "rip":"exchange1",
         "ip":"172.31.0.110",
         "weight":"100"
      },
      {
         "action":"add-rip",
         "vip":"exchange_smtp",
         "rip":"exchange2",
         "ip":"172.31.200.0",
         "weight":"100"
      }
   ]
}We will call this JSON template as we have done before but this time to the IP Address the first appliance has "172.31.200.2"
./apicall.sh --loadbalancer 172.31.200.2 --username loadbalancer --password loadbalancer --json vip_rip.json --apikey $apikey_masterWhile we wait for the JSON to be processed on the Loadbalancer.org appliance if you look at the WUI you will see the Virtual Services and their real servers being added and if successful you will then see the output much like below:
{"lbapi":[
      {"itteration":[
            {"lbcli":[
                  {
                     "action":"add-vip",
                     "vip":"webserver",
                     "status":"success"
                  }
               ]
            }
         ]
      },
      {"itteration":[
            {"lbcli":[
                  {
                     "action":"edit-vip",
                     "vip":"webserver",
                     "status":"success"
                  }
               ]
            }
         ]
      },
      {"itteration":[
            {"lbcli":[
                  {
                     "action":"add-rip",
                     "vip":"webserver",
                     "rip":"webserver0",
                     "status":"success"
                  }
               ]
            }
         ]
      },
      {"itteration":[
            {"lbcli":[
                  {
                     "action":"add-rip",
                     "vip":"webserver",
                     "rip":"webserver1",
                     "status":"success"
                  }
               ]
            }
         ]
      },
      {"itteration":[
            {"lbcli":[
                  {
                     "action":"add-rip",
                     "vip":"webserver",
                     "rip":"ws2",
                     "status":"success"
                  }
               ]
            }
         ]
      },
      {"itteration":[
            {"lbcli":[
                  {
                     "action":"add-vip",
                     "vip":"owa",
                     "status":"success"
                  }
               ]
            }
         ]
      },
      {"itteration":[
            {"lbcli":[
                  {
                     "action":"edit-vip",
                     "vip":"owa",
                     "status":"success"
                  }
               ]
            }
         ]
      },
      {"itteration":[
            {"lbcli":[
                  {
                     "action":"add-rip",
                     "vip":"owa",
                     "rip":"owa0",
                     "status":"success"
                  }
               ]
            }
         ]
      },
      {"itteration":[
            {"lbcli":[
                  {
                     "action":"add-rip",
                     "vip":"owa",
                     "rip":"owa1",
                     "status":"success"
                  }
               ]
            }
         ]
      },
      {"itteration":[
            {"lbcli":[
                  {
                     "action":"add-rip",
                     "vip":"owa",
                     "rip":"owa2",
                     "status":"success"
                  }
               ]
            }
         ]
      },
      {"itteration":[
            {"lbcli":[
                  {
                     "action":"add-vip",
                     "vip":"exchange_smtp",
                     "status":"success"
                  }
               ]
            }
         ]
      },
      {"itteration":[
            {"lbcli":[
                  {
                     "action":"edit-vip",
                     "vip":"exchange_smtp",
                     "status":"success"
                  }
               ]
            }
         ]
      },
      {"itteration":[
            {"lbcli":[
                  {
                     "action":"add-rip",
                     "vip":"exchange_smtp",
                     "rip":"exchange0",
                     "status":"success"
                  }
               ]
            }
         ]
      },
      {"itteration":[
            {"lbcli":[
                  {
                     "action":"add-rip",
                     "vip":"exchange_smtp",
                     "rip":"exchange1",
                     "status":"success"
                  }
               ]
            }
         ]
      },
      {"itteration":[
            {"lbcli":[
                  {
                     "action":"add-rip",
                     "vip":"exchange_smtp",
                     "rip":"exchange2",
                     "status":"success"
                  }
               ]
            }
         ]
      }
   ]
}So what have we done? Initial network configuration of two appliances out of the box, next we created the HA Pair and then proceeded to add the virtual services and its associated real server and this leaves only to restart services which we will do now, we can use the same JSON file for each Master and Slave Loadbalancer.org appliance
{"lbcli":[
      {
         "action":"reload-haproxy"
      },
      {
         "action":"reload-heartbeat"
      }
   ]
}We will take the above JSON now and reload the required services affected by creating the HA Pair and adding Layer7 Virtual services
./apicall.sh --loadbalancer 172.31.200.2 --username loadbalancer --password loadbalancer --json reload_services.json --apikey $apikey_master
./apicall.sh --loadbalancer 172.31.200.3 --username loadbalancer --password loadbalancer --json reload_services.json --apikey $apikey_slaveAnd the results of reloading the two affected services should show this output for each APICALL
{
   "lbapi":[
      {"itteration":[
            {"lbcli":[
                  {
                     "action":"reload-haproxy",
                     "status":"success"
                  }
               ]
            }
         ]
      },
      {"itteration":[
            {"lbcli":[
                  {
                     "action":"reload-heartbeat",
                     "status":"success"
                  }
               ]
            }
         ]
      }
   ]
}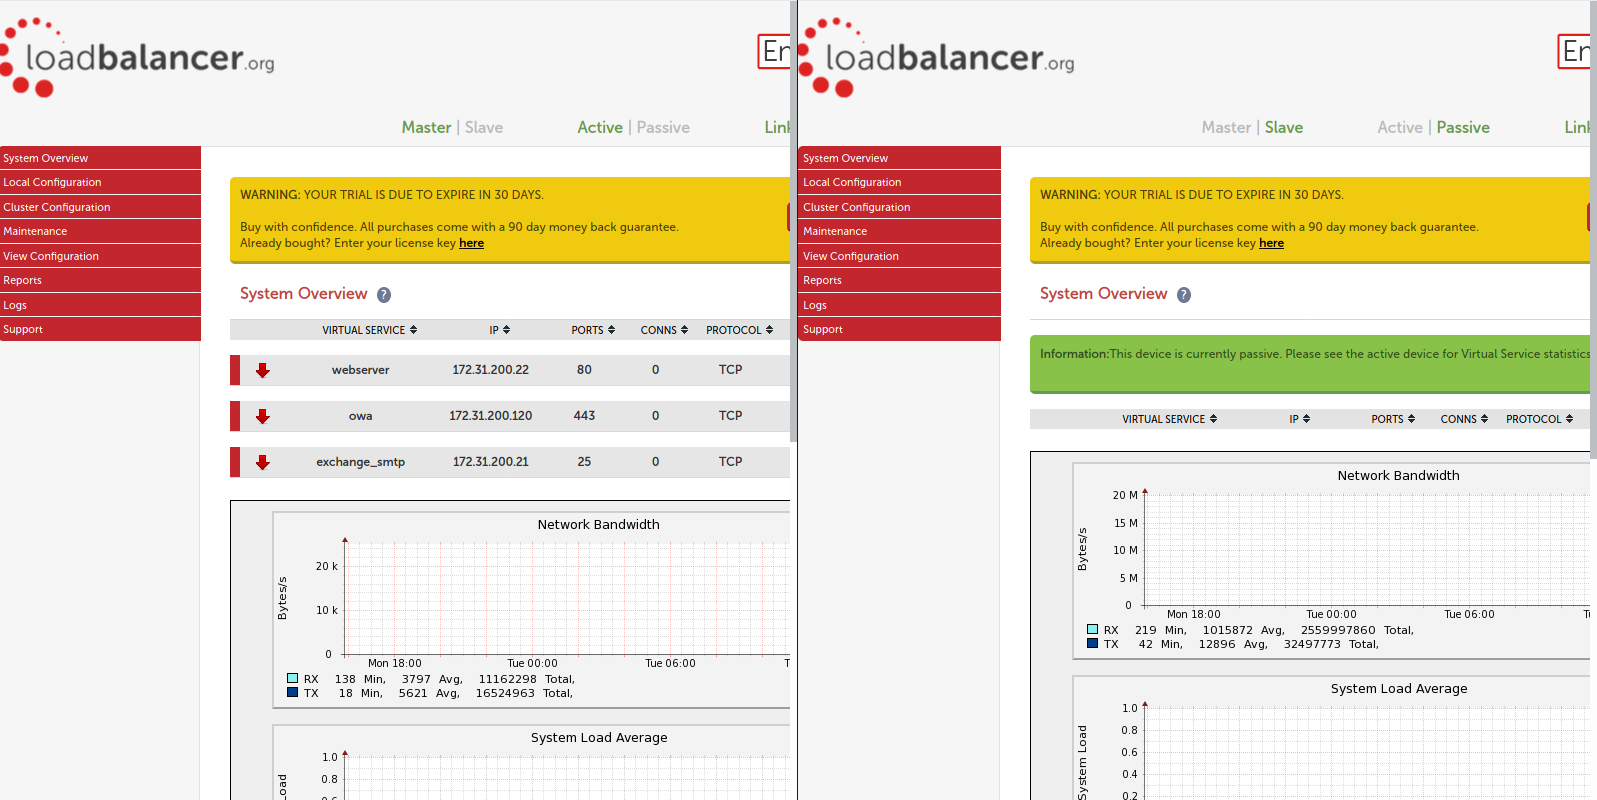
So there we have it, a pair of fully deployed Loadbalancer.org appliances in HA with a web server virtual virtual service, Exchange OWA and an SMTP VIP.
Now at the start of the blog I made reference to the spellchecking features added in v8.4.1 and I will not spend much time on this other than show a single example of how LBCLI tried to help you.
Below I intentionally spell forwarding incorrect to show how LBCLI will suggest the correct key or value:
[root@mole ~]# lbcli --action add-vip --vip test --layer 4 --fording gate --protocol tcpp{"lbcli":[
{
"core":"input",
"error":"7",
"argv":"fording",
"suggested":"forwarding",
"status":"fatal"
}
]
}So that shows how the keys are checked on your input. Now I will show you how your values are represented when correct by spelling tcp wrongly as ttcp:
[root@mole ~]# lbcli --action add-vip --vip test --layer 4 --forwarding gate --protocol tcpp
The returned JSON reply hopefully shows you where things went wrong:
{"lbcli":[
      {
         "core":"input",
         "command":"protocol",
         "value":"tcpp",
         "suggested":"tcp",
         "allowed":[
            "tcp",
            "udp",
            "tcpudp",
            "ops",
            "fwm"
         ],
         "status":"fatal"
      }
   ]
}I think that sums up How to automate your load balancer, part 2. If you have any questions please do not hesitate to ask, and if all goes horribly wrong then email support@loadbalancer.org and let us know what happened – so we can do our very best to fix whatever the issue might be! Attaching /var/log/lbadmin.log should be enough to find any problems. Happy Automation.
If you like any of the scripts above, please download them here - or over at GitHub.