

Although it's not technically a standard, the X-Forwarded-For (XFF) header is incredibly useful if you have any kind of proxy in front of your web servers.
What's the issue?
When you load balance your website at layer 7, it will become non-transparent. This means that the actual client source IP address is replaced by the load balancer's own IP address - and only this address will be recorded in the IIS logs.
One way around this is to insert XFF headers on the load balancer to track the actual client source IP address. IIS can then be reconfigured to make this data available in the logs.
NB. The other options to gain source IP transparency are to configure the load balancer in layer 4 NAT mode, layer 4 DSR mode or Layer 7 with TPROXY enabled.
--> Did you want to learn about XFF on Apache?
The solution - how to modify logging behaviour
The steps required depend on your version of IIS.
IIS 8.5 & later
A custom logging field can be added to record XFF headers.
To enable this feature:
- Start IIS Manager, then on the Connections pane on the left, click the appropriate website where you want to enable XFF logging. The Home page is then displayed in the main panel.
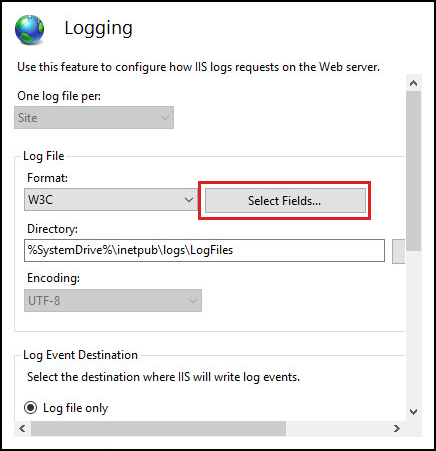
- From the Home page, double-click Logging.

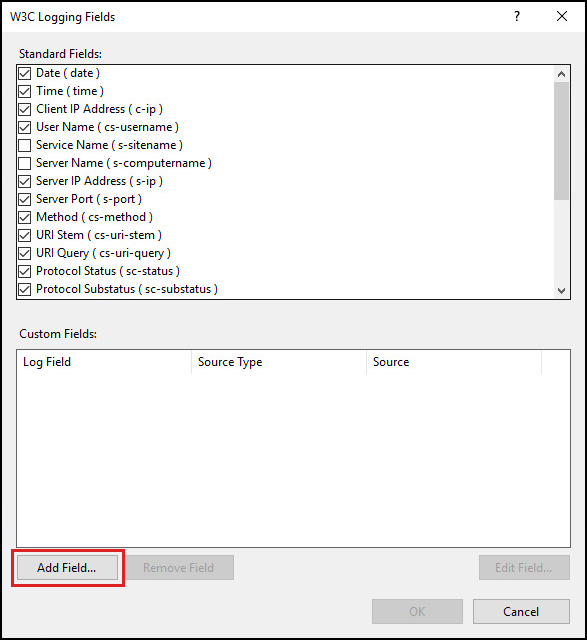
- From the Log File section, click Select Fields.
- From the bottom left corner, click Add Field.
- In the Add Custom Field window, complete the following:
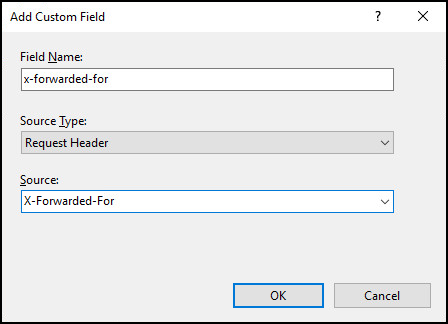
- in Field Name, type X-Forwarded-For
- in Source, type X-Forwarded-For
- leave Source Type set to ‘Request Header’
- click OK on the Add Custom Field window
- click OK on the W3C Logging Fields window
- From the Actions pane on the right, click Apply to implement the change.

- The log files are located by default in the directory %SystemDrive%\inetpub\logs\LogFiles. IIS creates new log files and appends “_x” to the log file names to indicate that they contain custom fields.
UIIS 7 & IIS 7.5
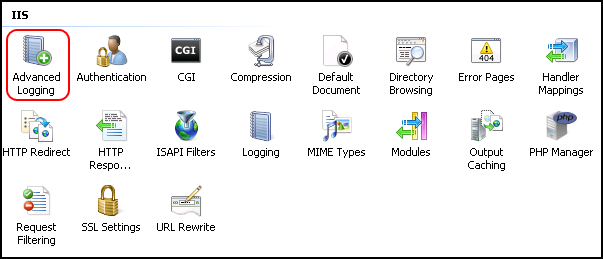
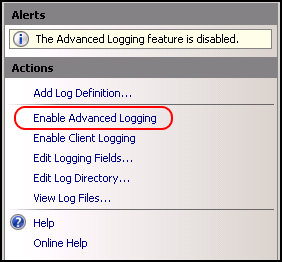
For IIS 7 & 7.5 the Advanced Logging add-on must be installed. This can be downloaded here. Once installed on the IIS server, you'll see an extra option called 'Advanced Logging' in IIS.
To configure and enable Advanced Logging:
- Start IIS Manager, then on the Connections pane on the left, click the server, website or directory where you want to configure Advanced Logging. The related Home page is displayed in the main panel.
- From the Home page, under IIS, double-click Advanced Logging.
- From the Actions pane on the right, click Enable Advanced Logging.
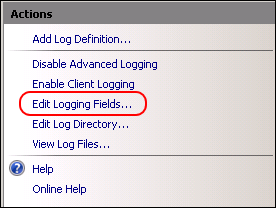
- From the Actions pane on the right, click Edit Logging Fields.
- On the Edit Logging Fields window click Add Field, and then complete the following:
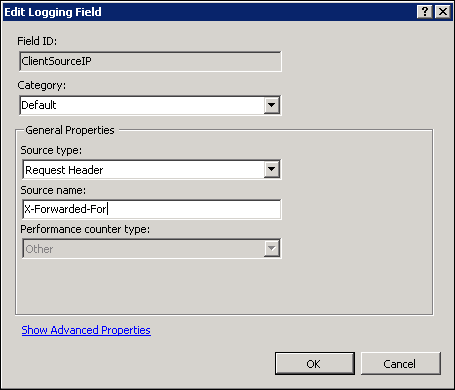
- in Field ID, type ClientSourceIP
- in Category, type *Default *
- in Source type, select Request Header
- in Source name, type X-Forwarded-For
- click OK on the Add Logging Field form
- click OK on the Edit Logging Fields form
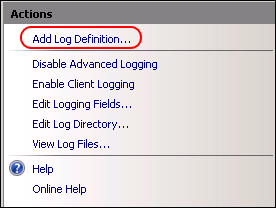
- From the Actions pane on the right, click Add Log Definition.
- Enter Client Source IP in the Base file name field.
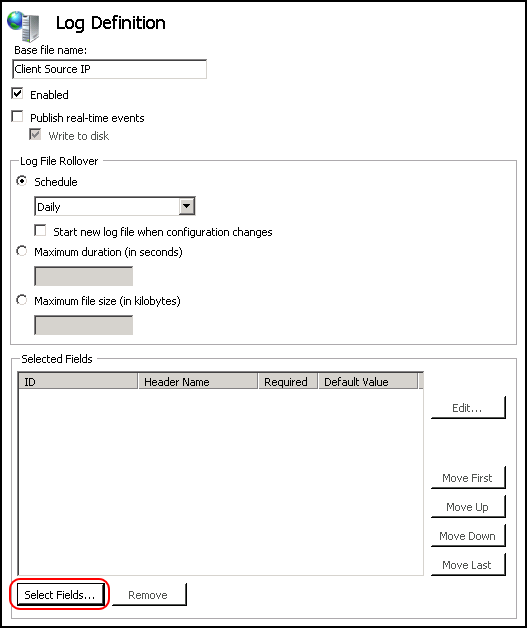
- Click Select Fields.
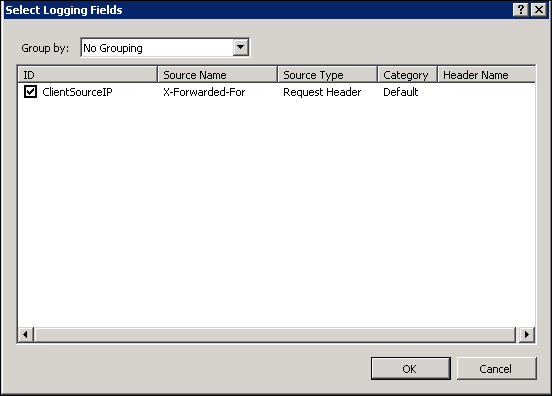
- Check (enable) the ClientSourceIP field created earlier
- Click OK on the Select Logging Fields form, then click Apply in the actions pane.
- Click Return To Advanced Logging in the actions pane.
- Run iisreset /restart to apply the new settings.
- The advanced log must be viewed rather than the default log. The advanced log is located in %SystemDrive%inetpublogsAdvancedLogs. To view the logs, right-click the Client Source IP log definition and click View Log Files.

IIS 6
Unfortunately, the Microsoft solution mentioned above is not available for IIS 6. Luckily there are a number of other solutions - some costing money and others that have been released as open source. One excellent example that we've tested with our products is F5's X-Forwarded-For ISAPI filter. It's available in both in 32- and 64-bit versions.
- Download the zipped archive from here and extract to an appropriate folder.
- Navigate to the relevant version (32- or 64-bit).
- Copy F5XForwardedFor.dll to a suitable location on your server, e.g. C:ISAPIfilters.
- Make sure you have ISAPI Filters enabled on your IIS server.
- Open IIS Manager, right-click the site and select Properties.
- Select the ISAPI Filters tab.
- Click add, then in the popup enter a suitable name and select the DLL file stored in step 3.
- Restart your website.
Problem solved - for IIS 7 and above, you should see an additional column named X-Forwarded-For which contains the IP addresses of client PC’s. For IIS 6 the IP address of the load balancer should be replaced with the IP address of client PC’s.